In a previous Blog, there was made mention about a New BMX Frame and Fork being purchased from overseas so as to be converted into a Project Bike….
“Click/ Tap below Image to find out more.”
In this Blog, we are going to be touching on some of the features that have since been applied since . Enjoy….
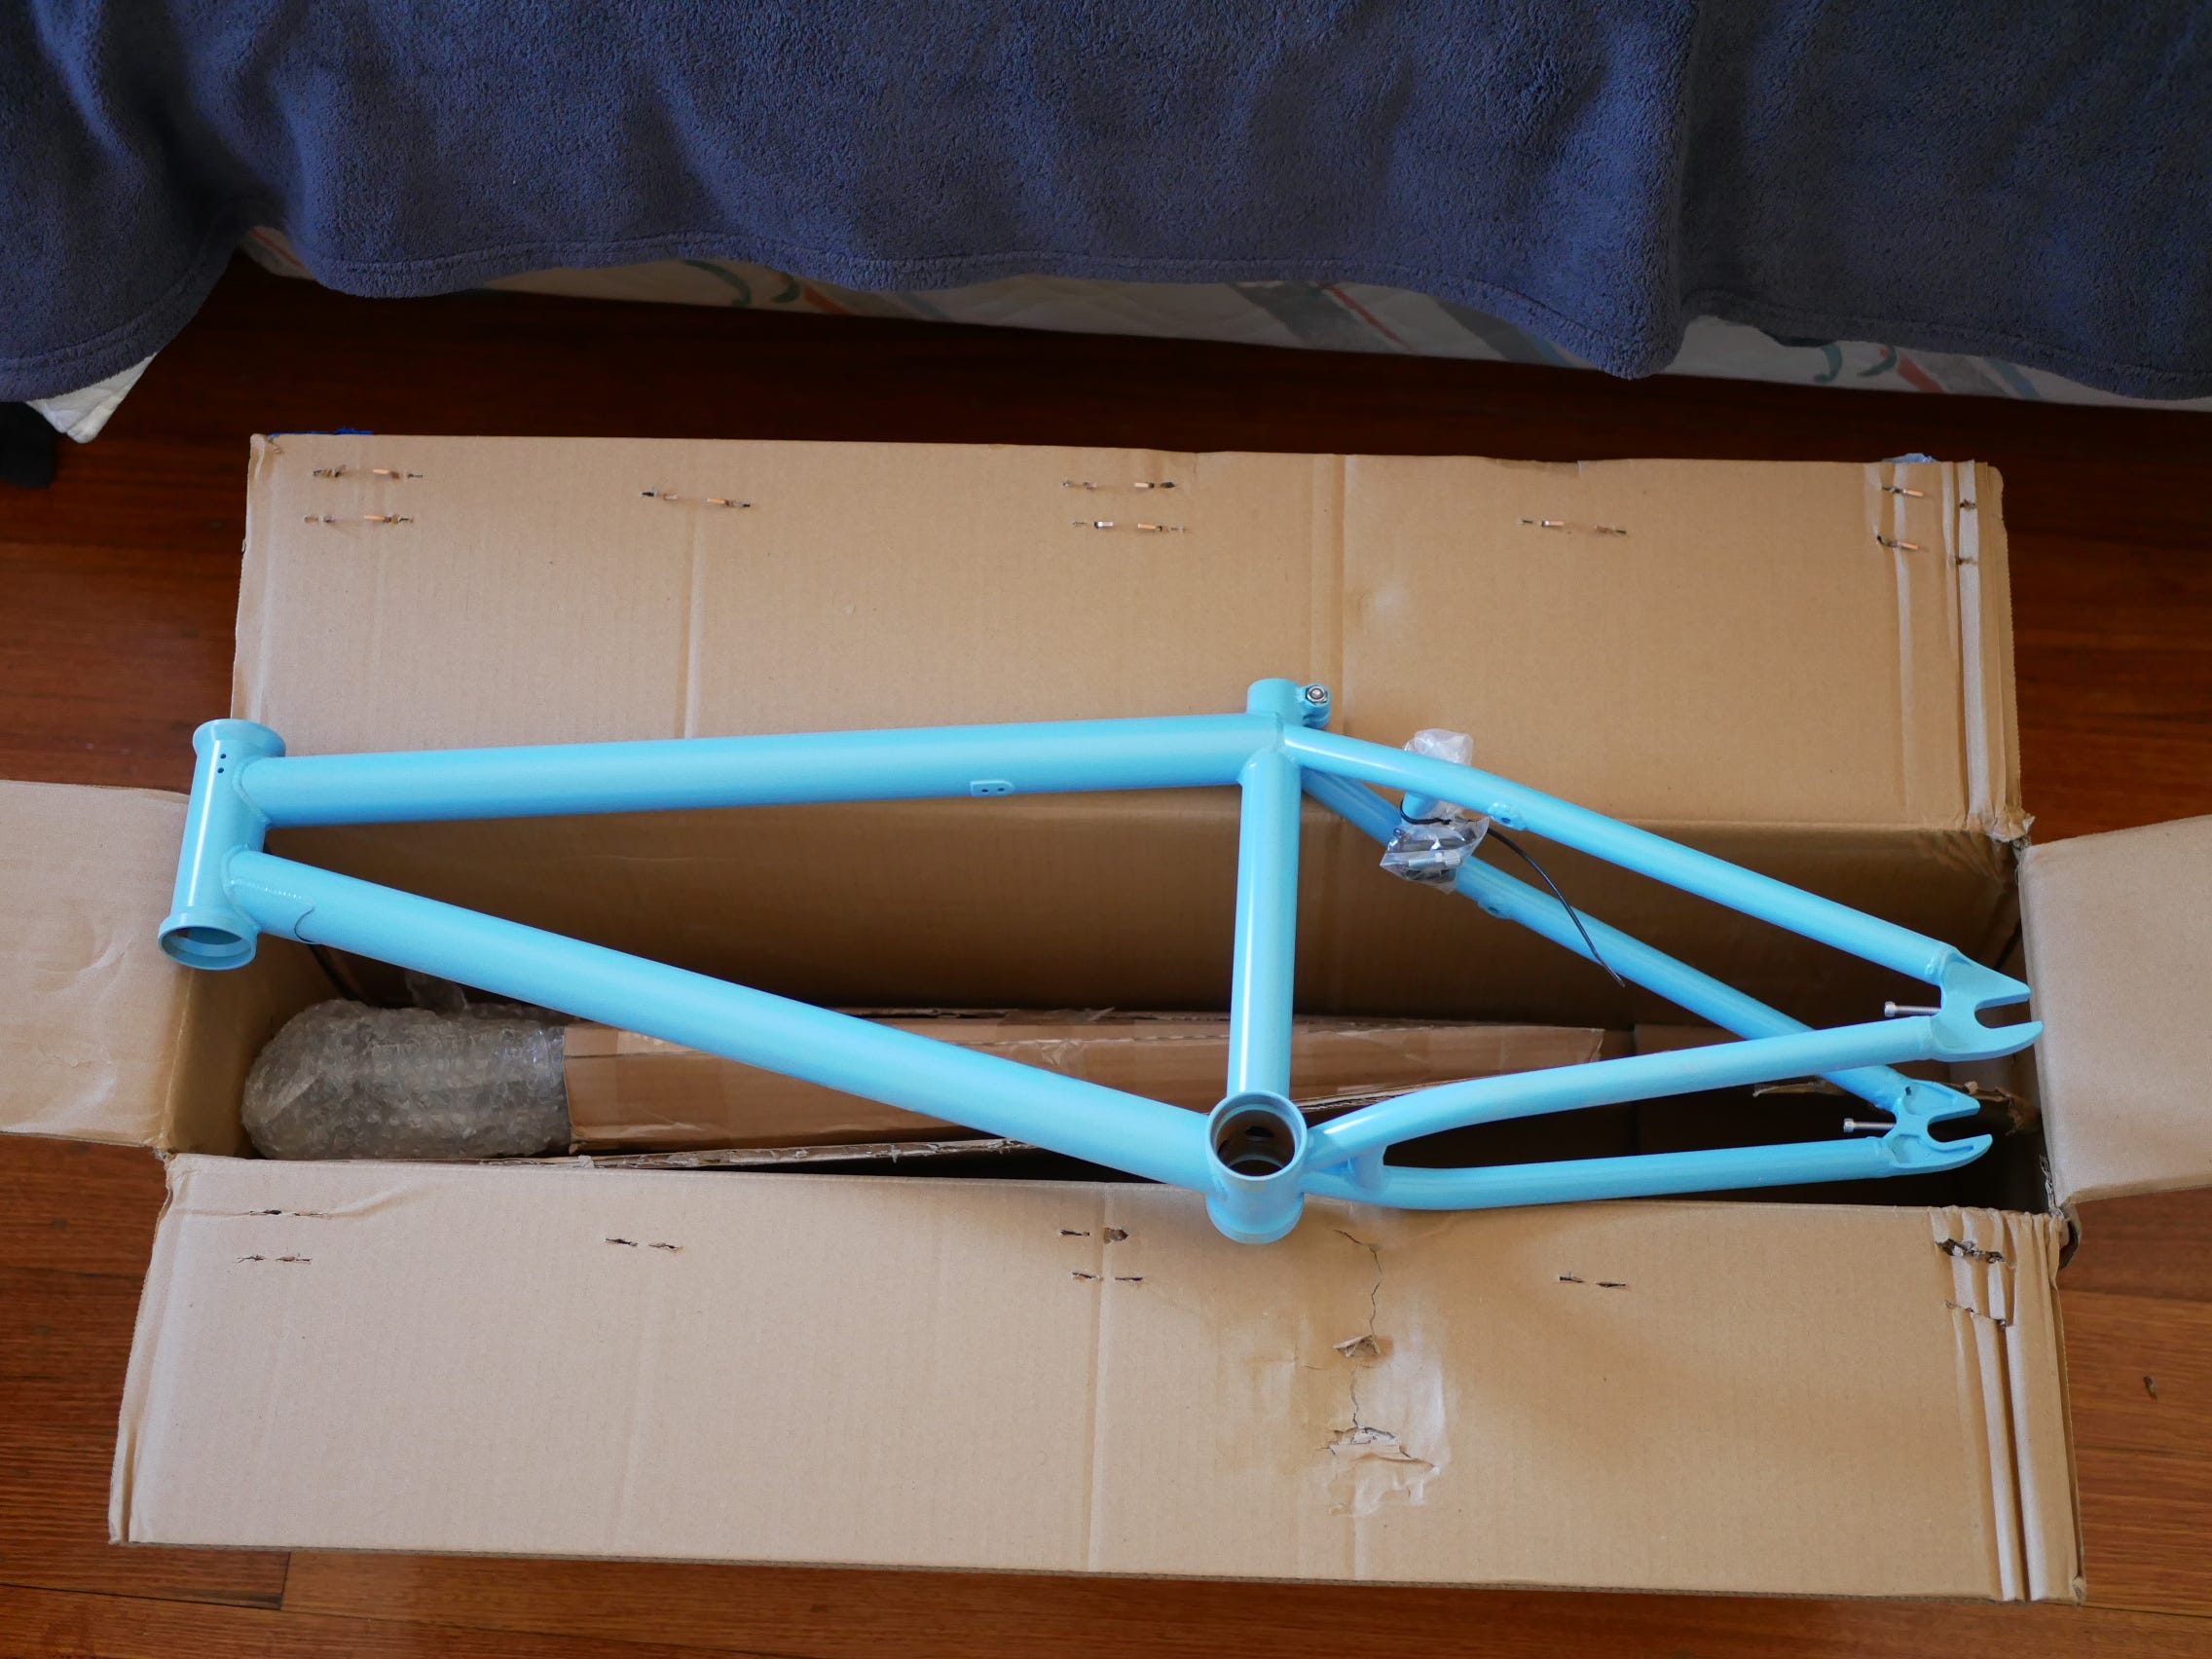
As the New BMX Frame and Fork finally arrived from quite a distance away, it was so good to finally open the box and take a good look inside.
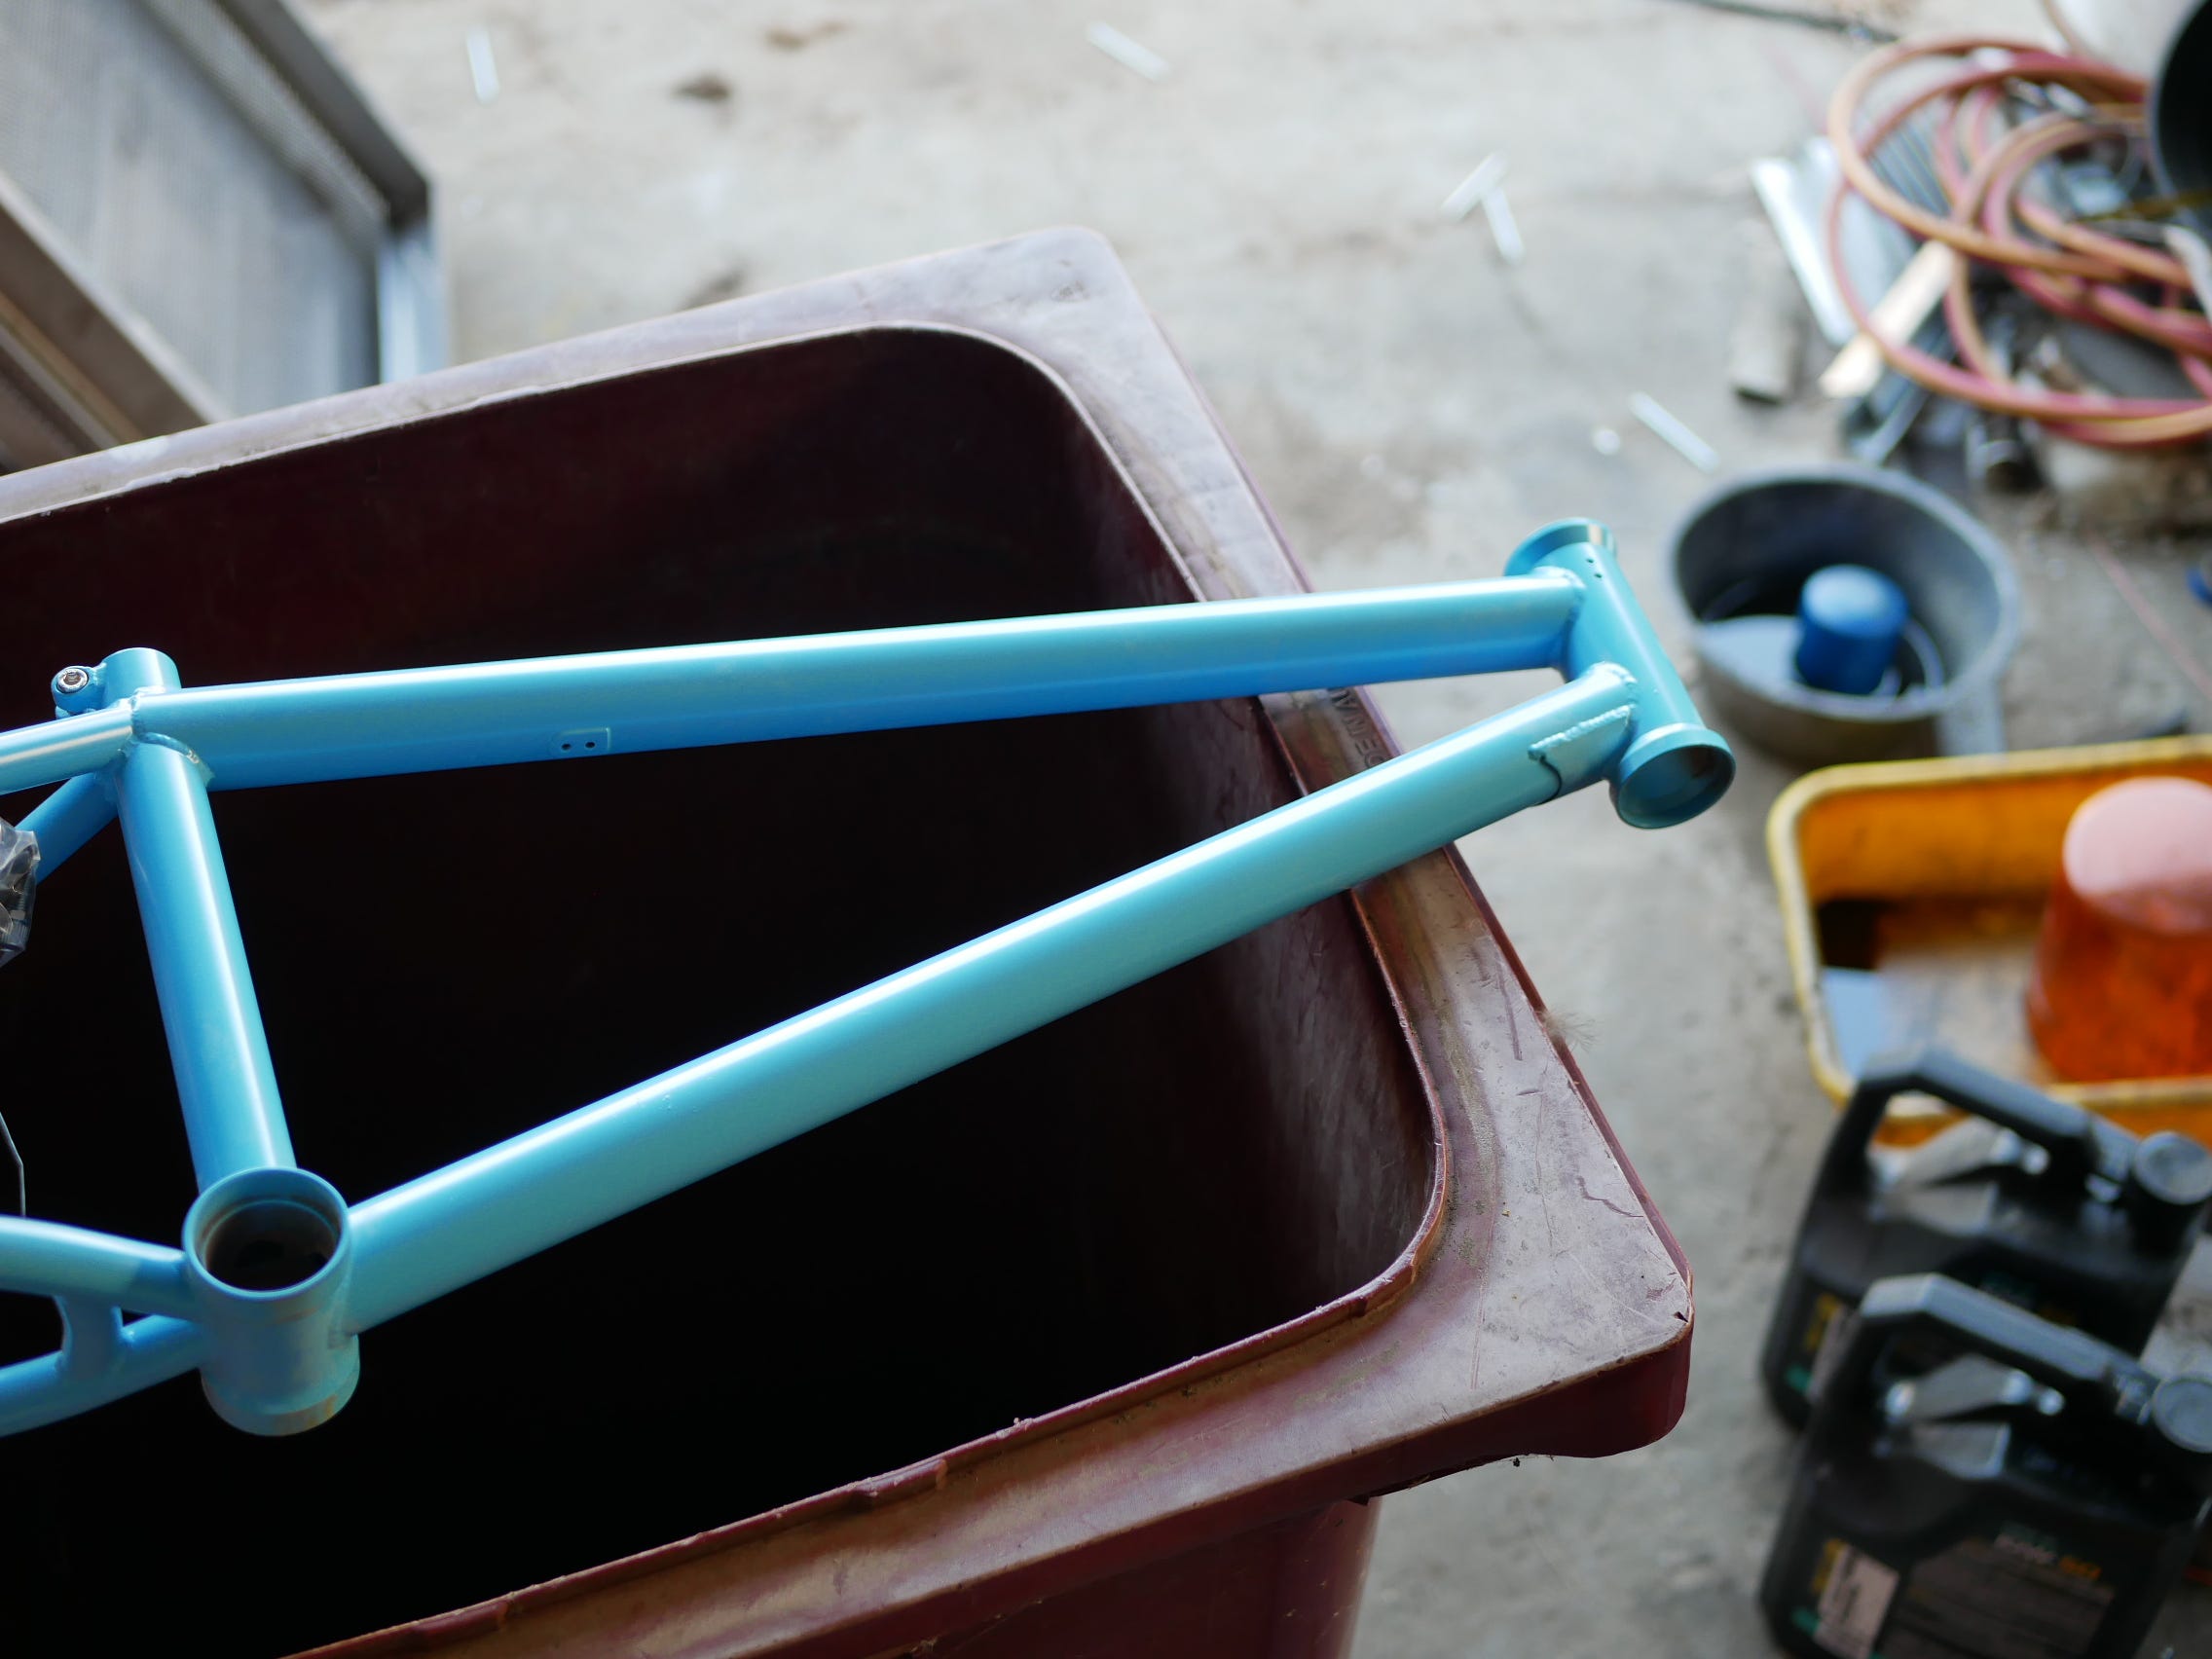
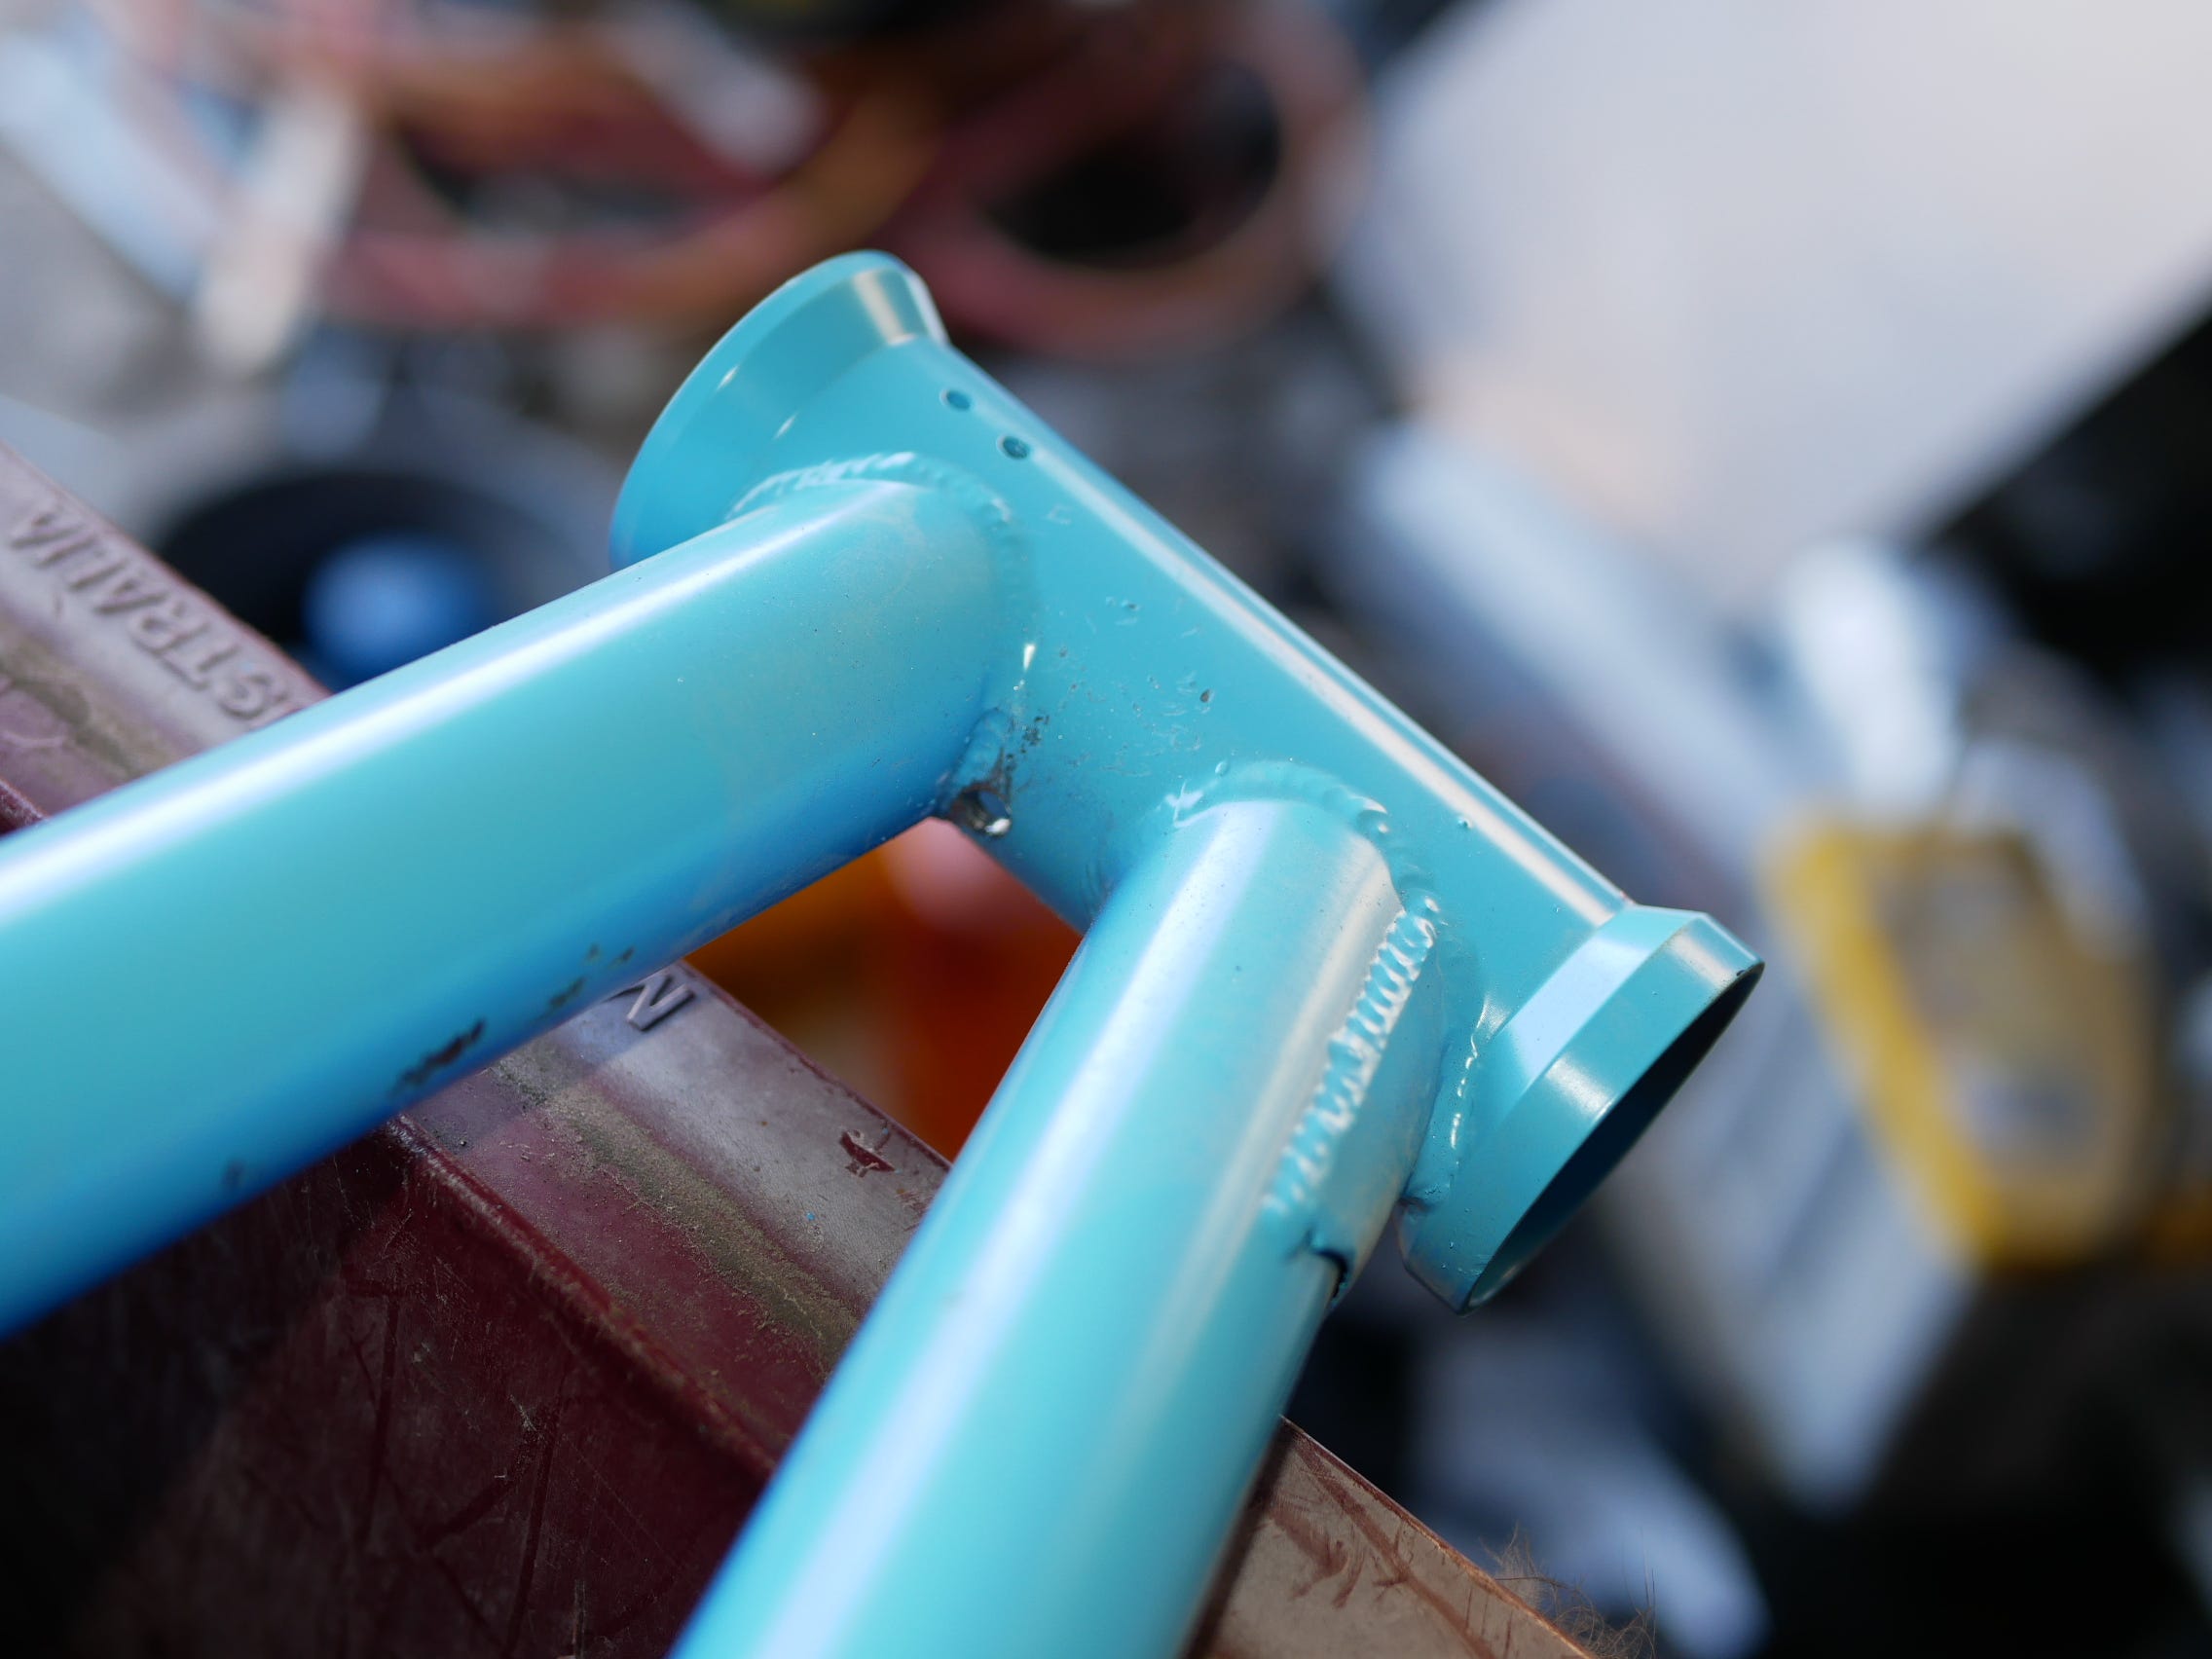
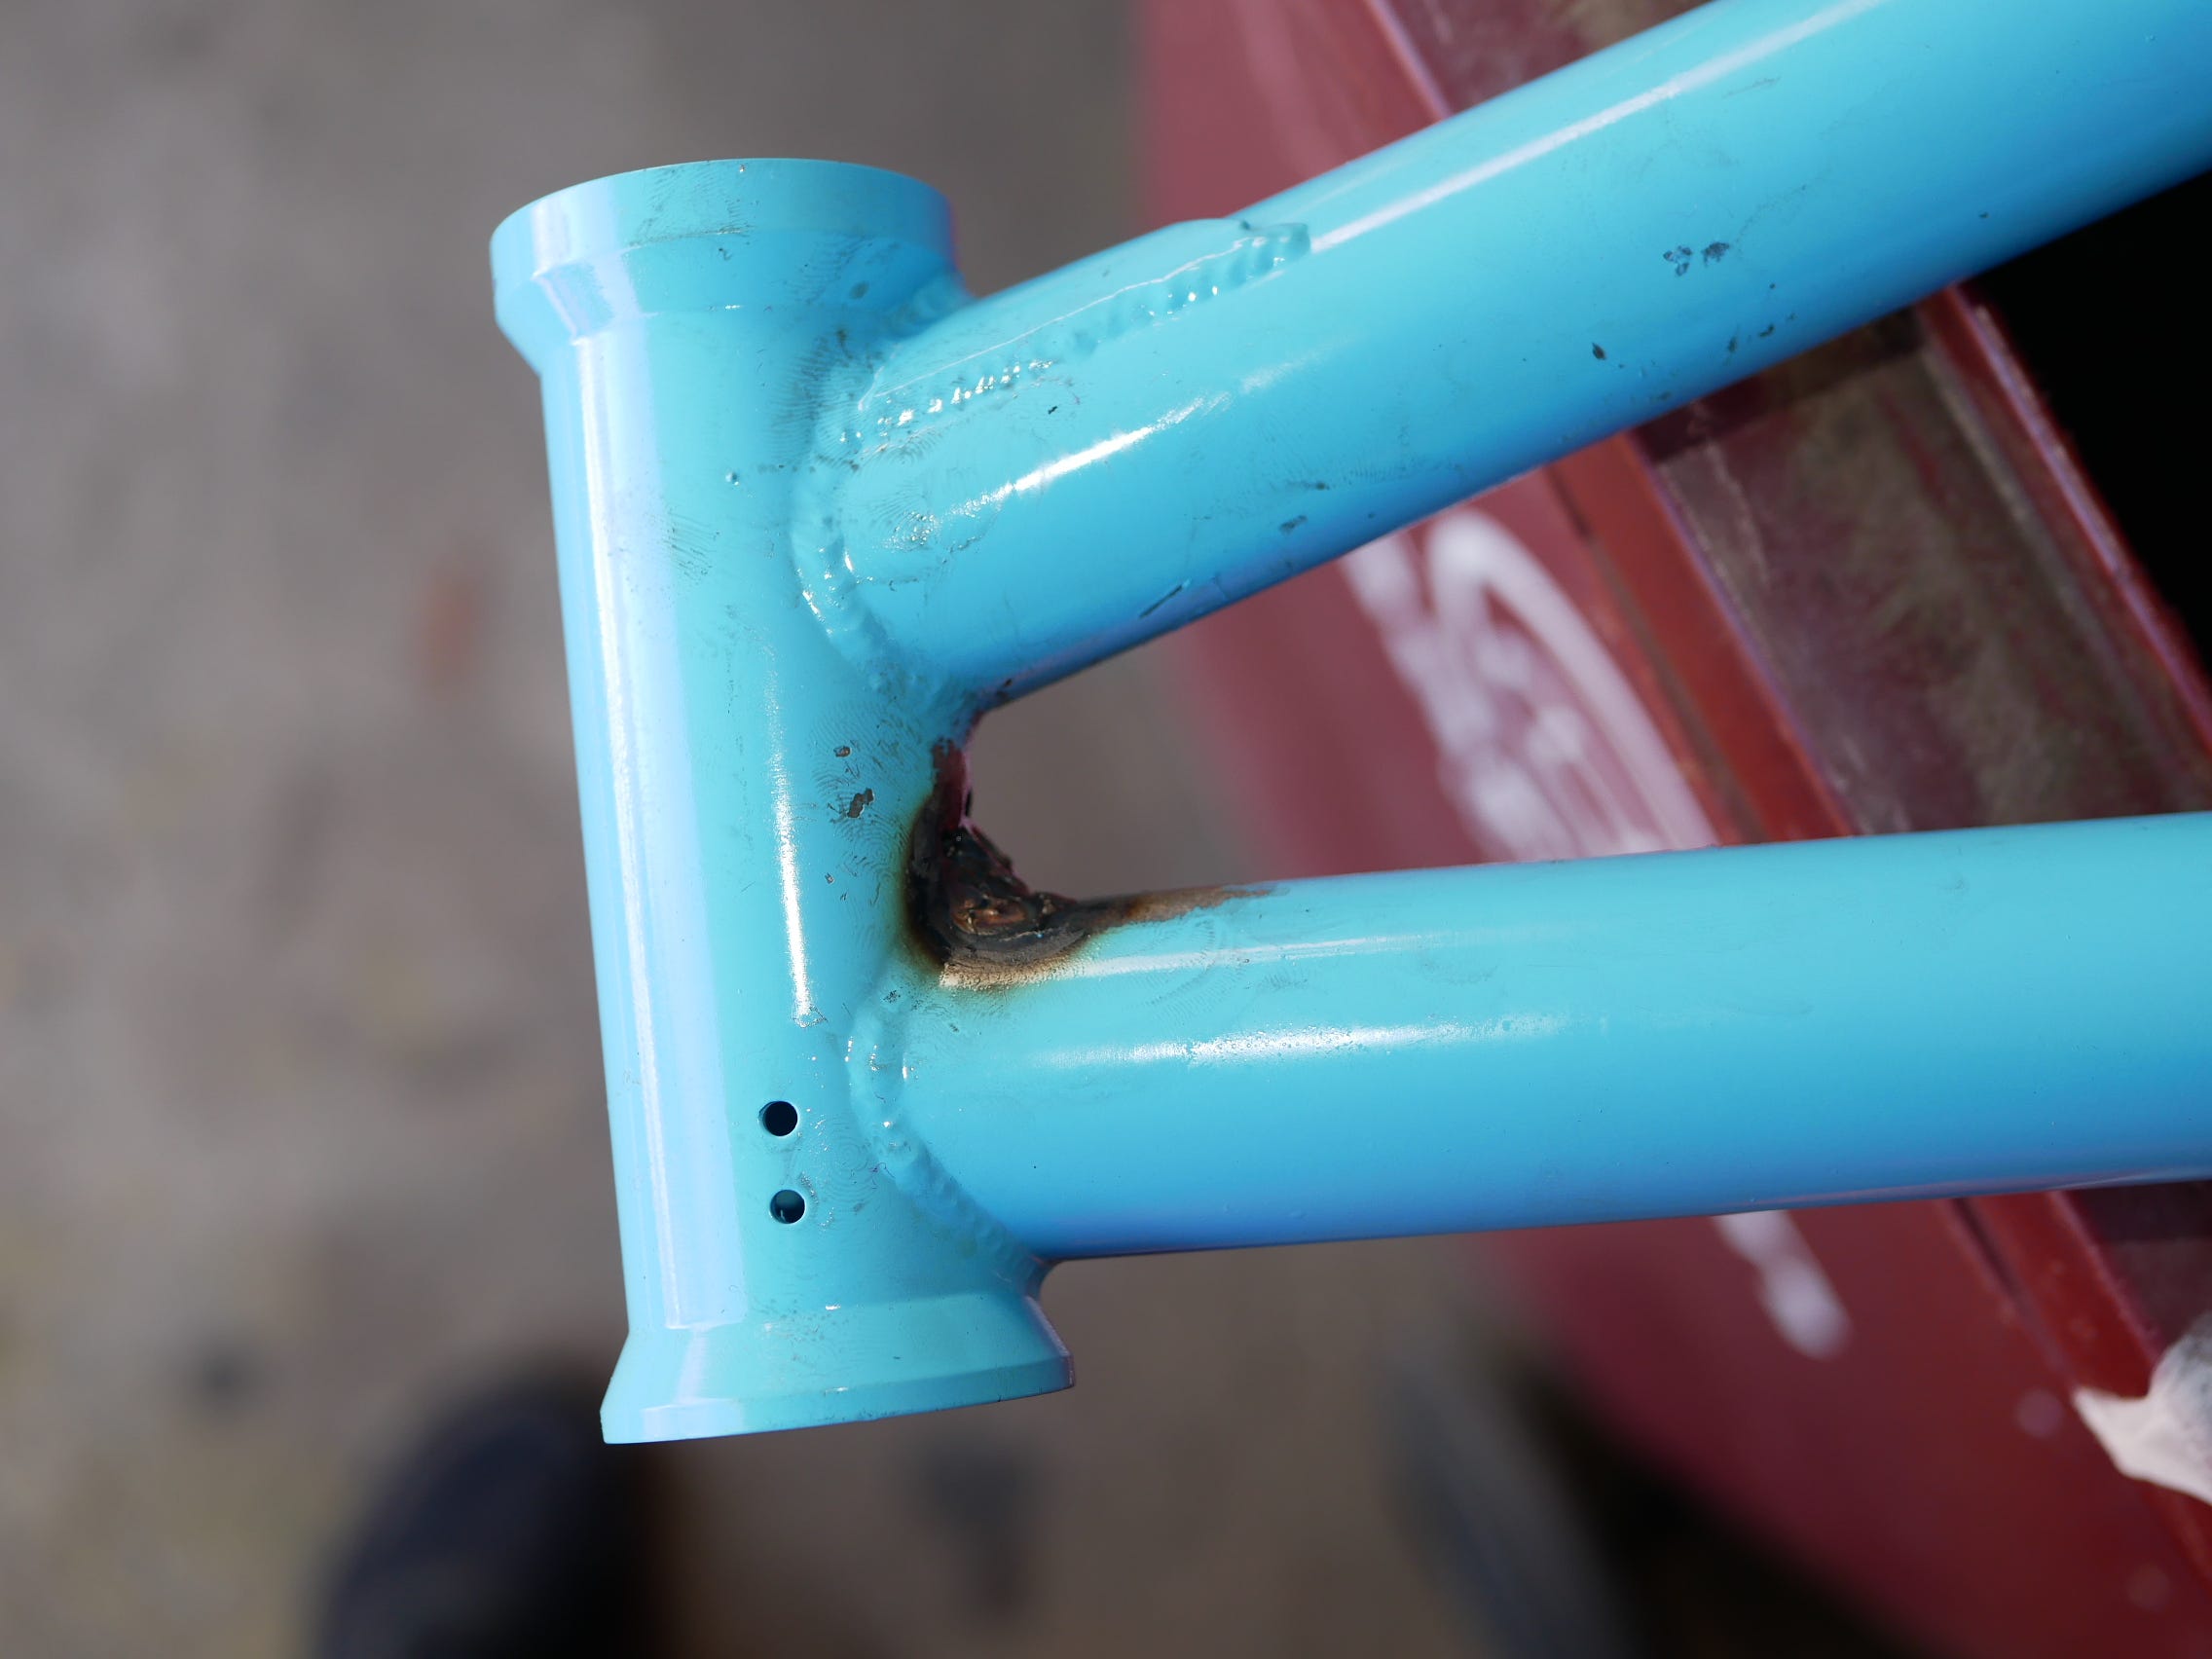
Being that this Bike is in the process of turning into a Project Bike, here is a little of what has been done with it starting out with working on a section of the Frame just behind the head-tube.
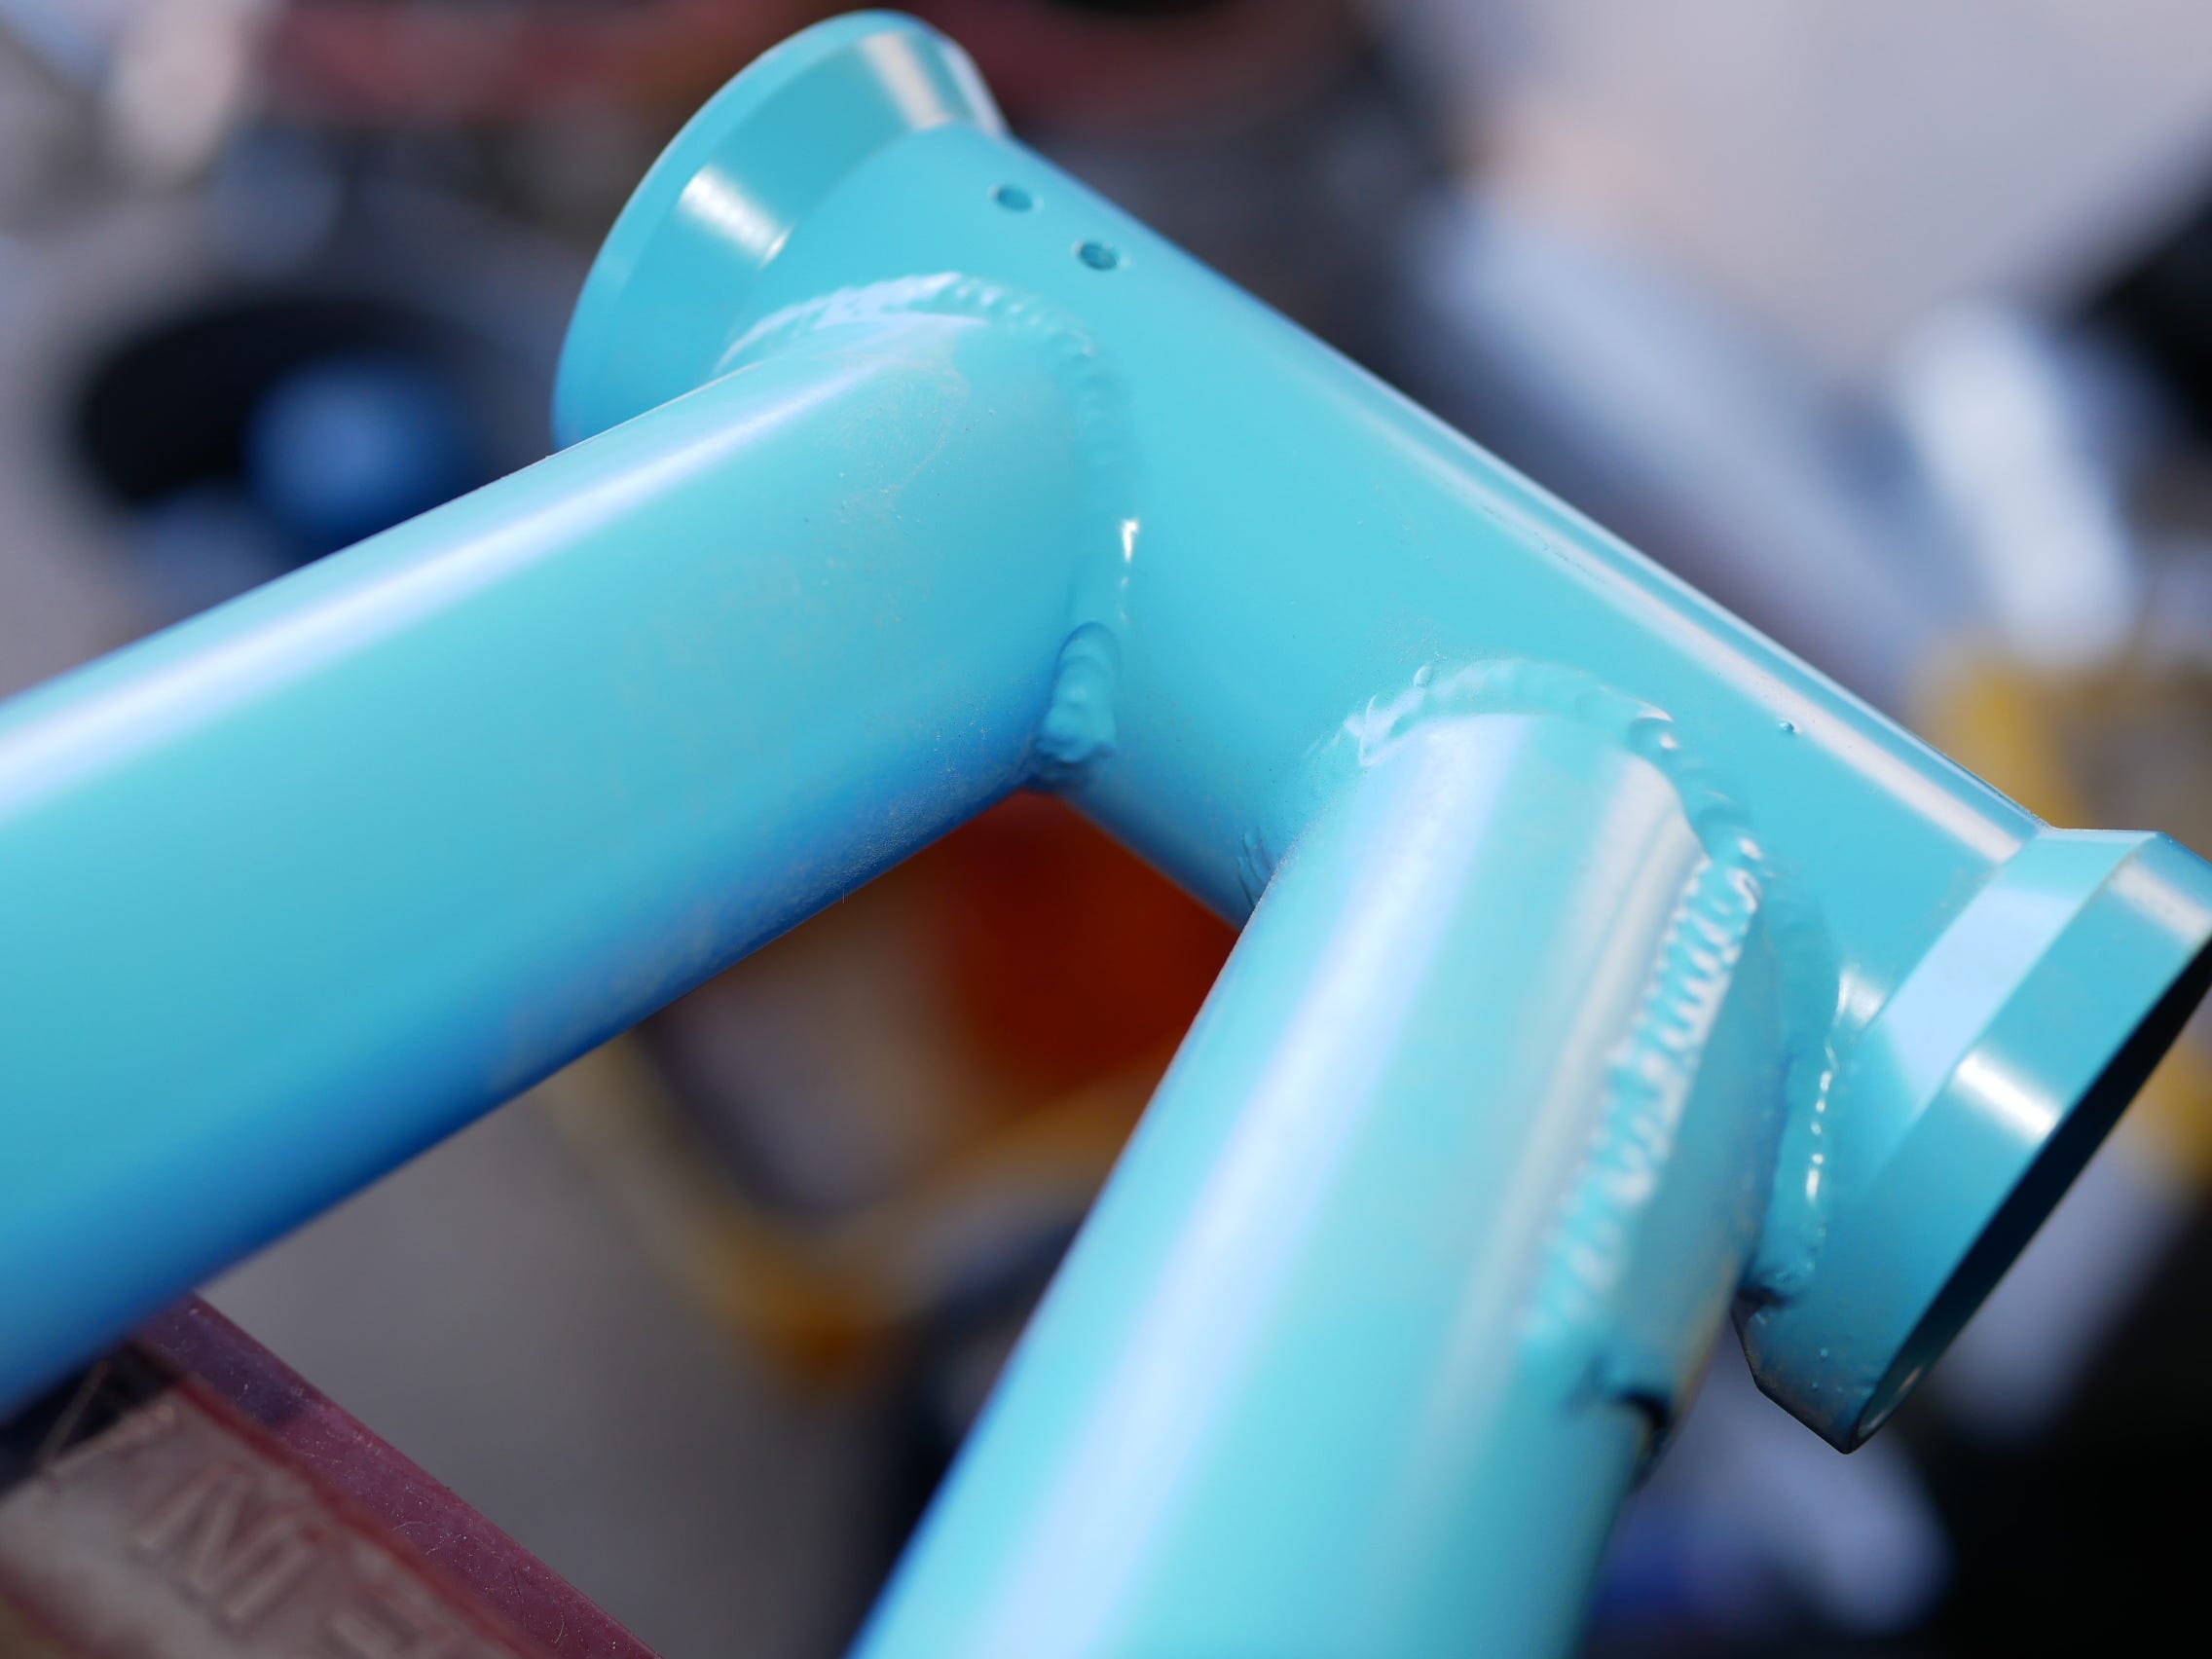
Beginning with a mark, “Pictured below” this was placed there so that a pilot hole could eventually be drilled.
Followed by the actual Hole.
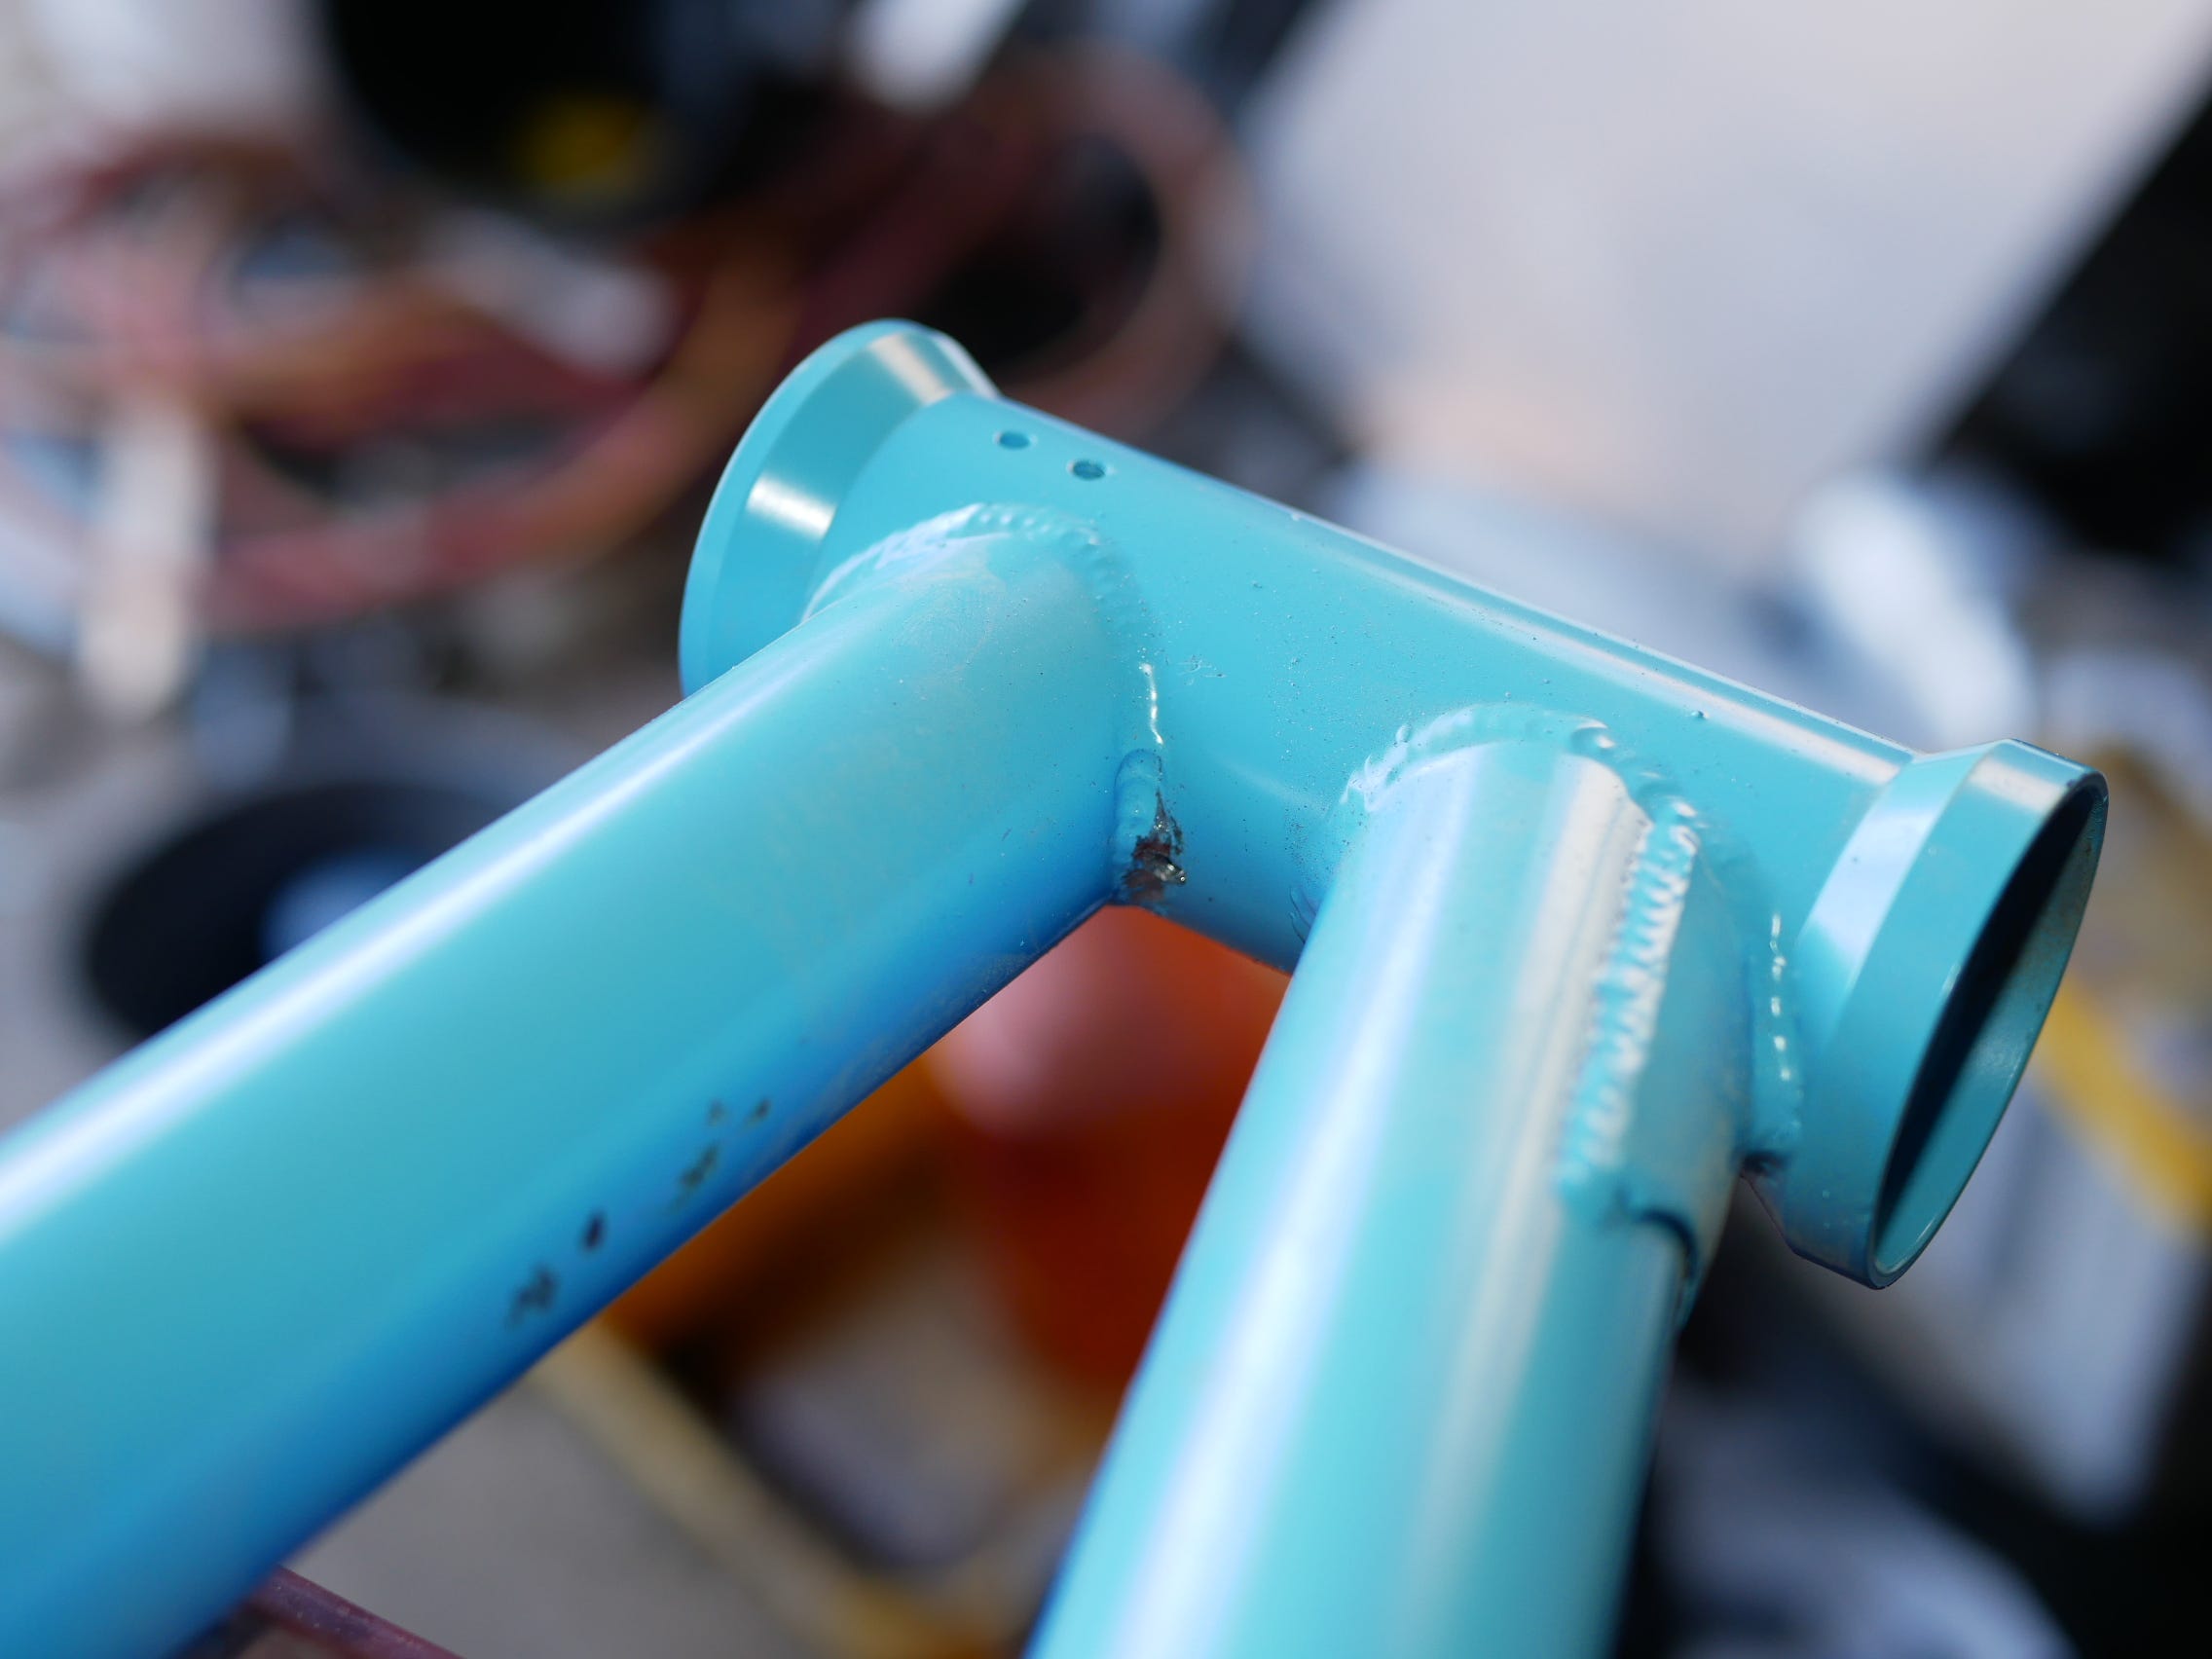
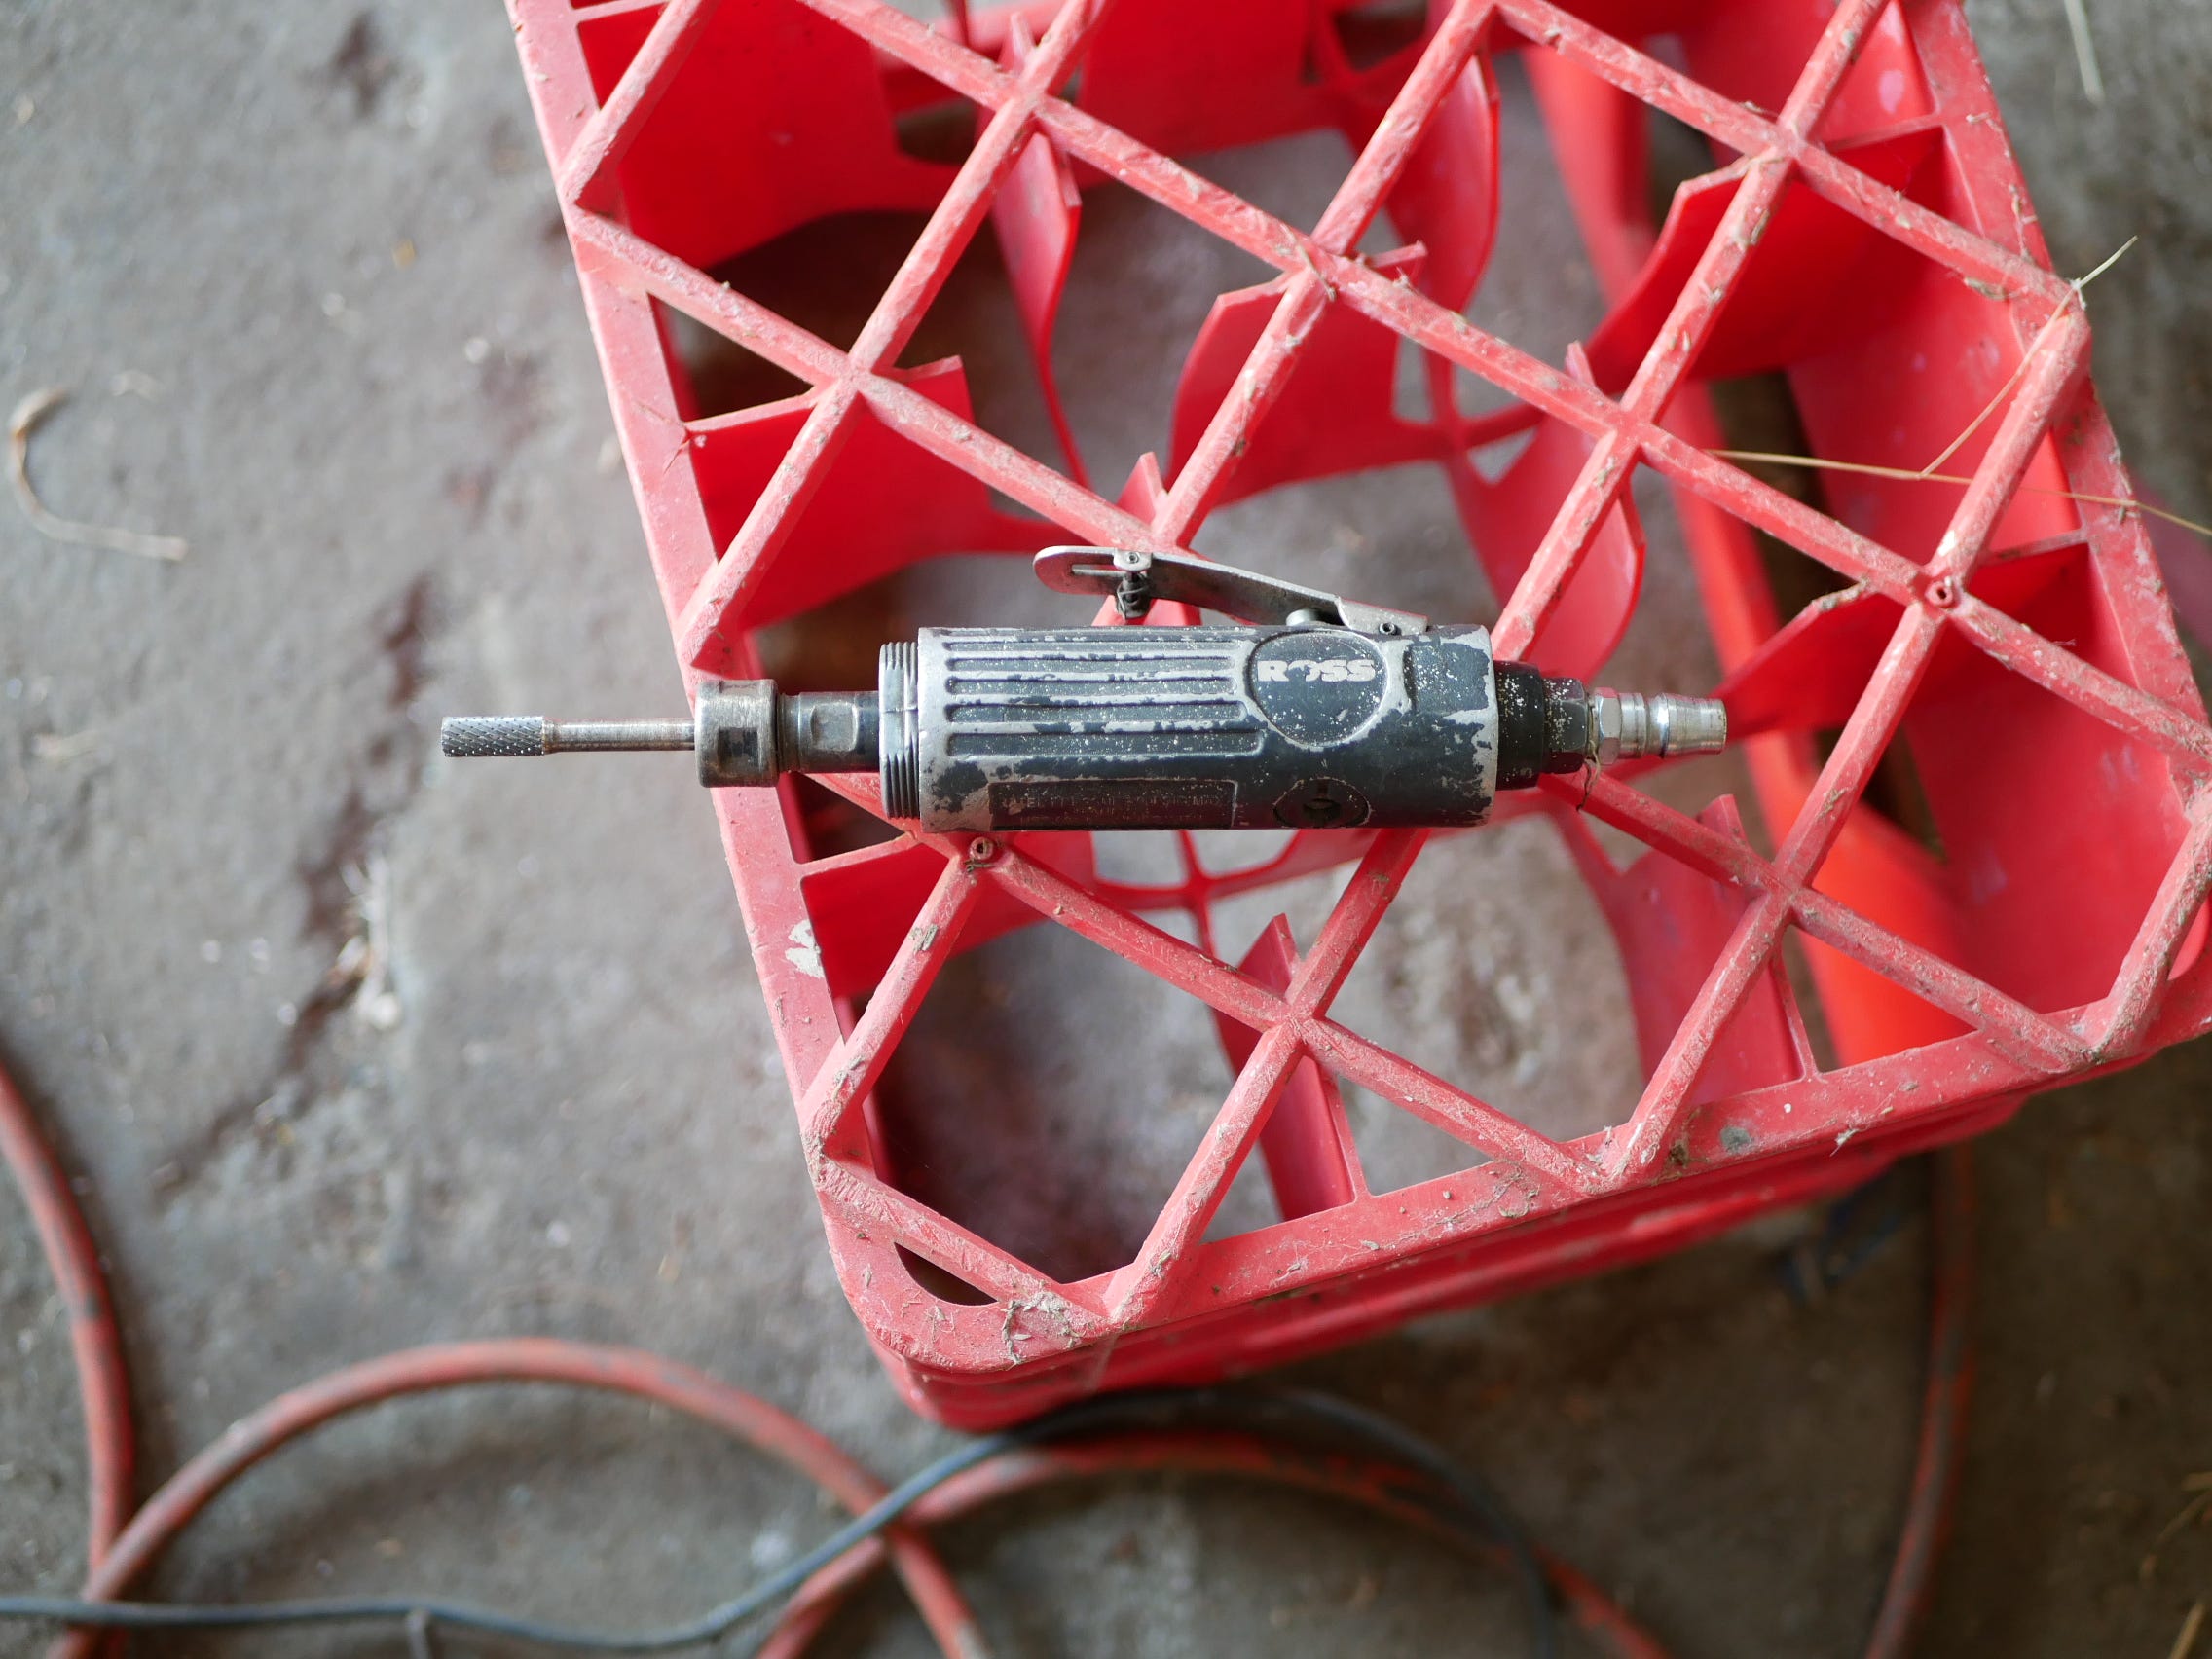
But what started off as something quite small went to something much Bigger thanks to the use of a Di-grinder “Pictured below”.
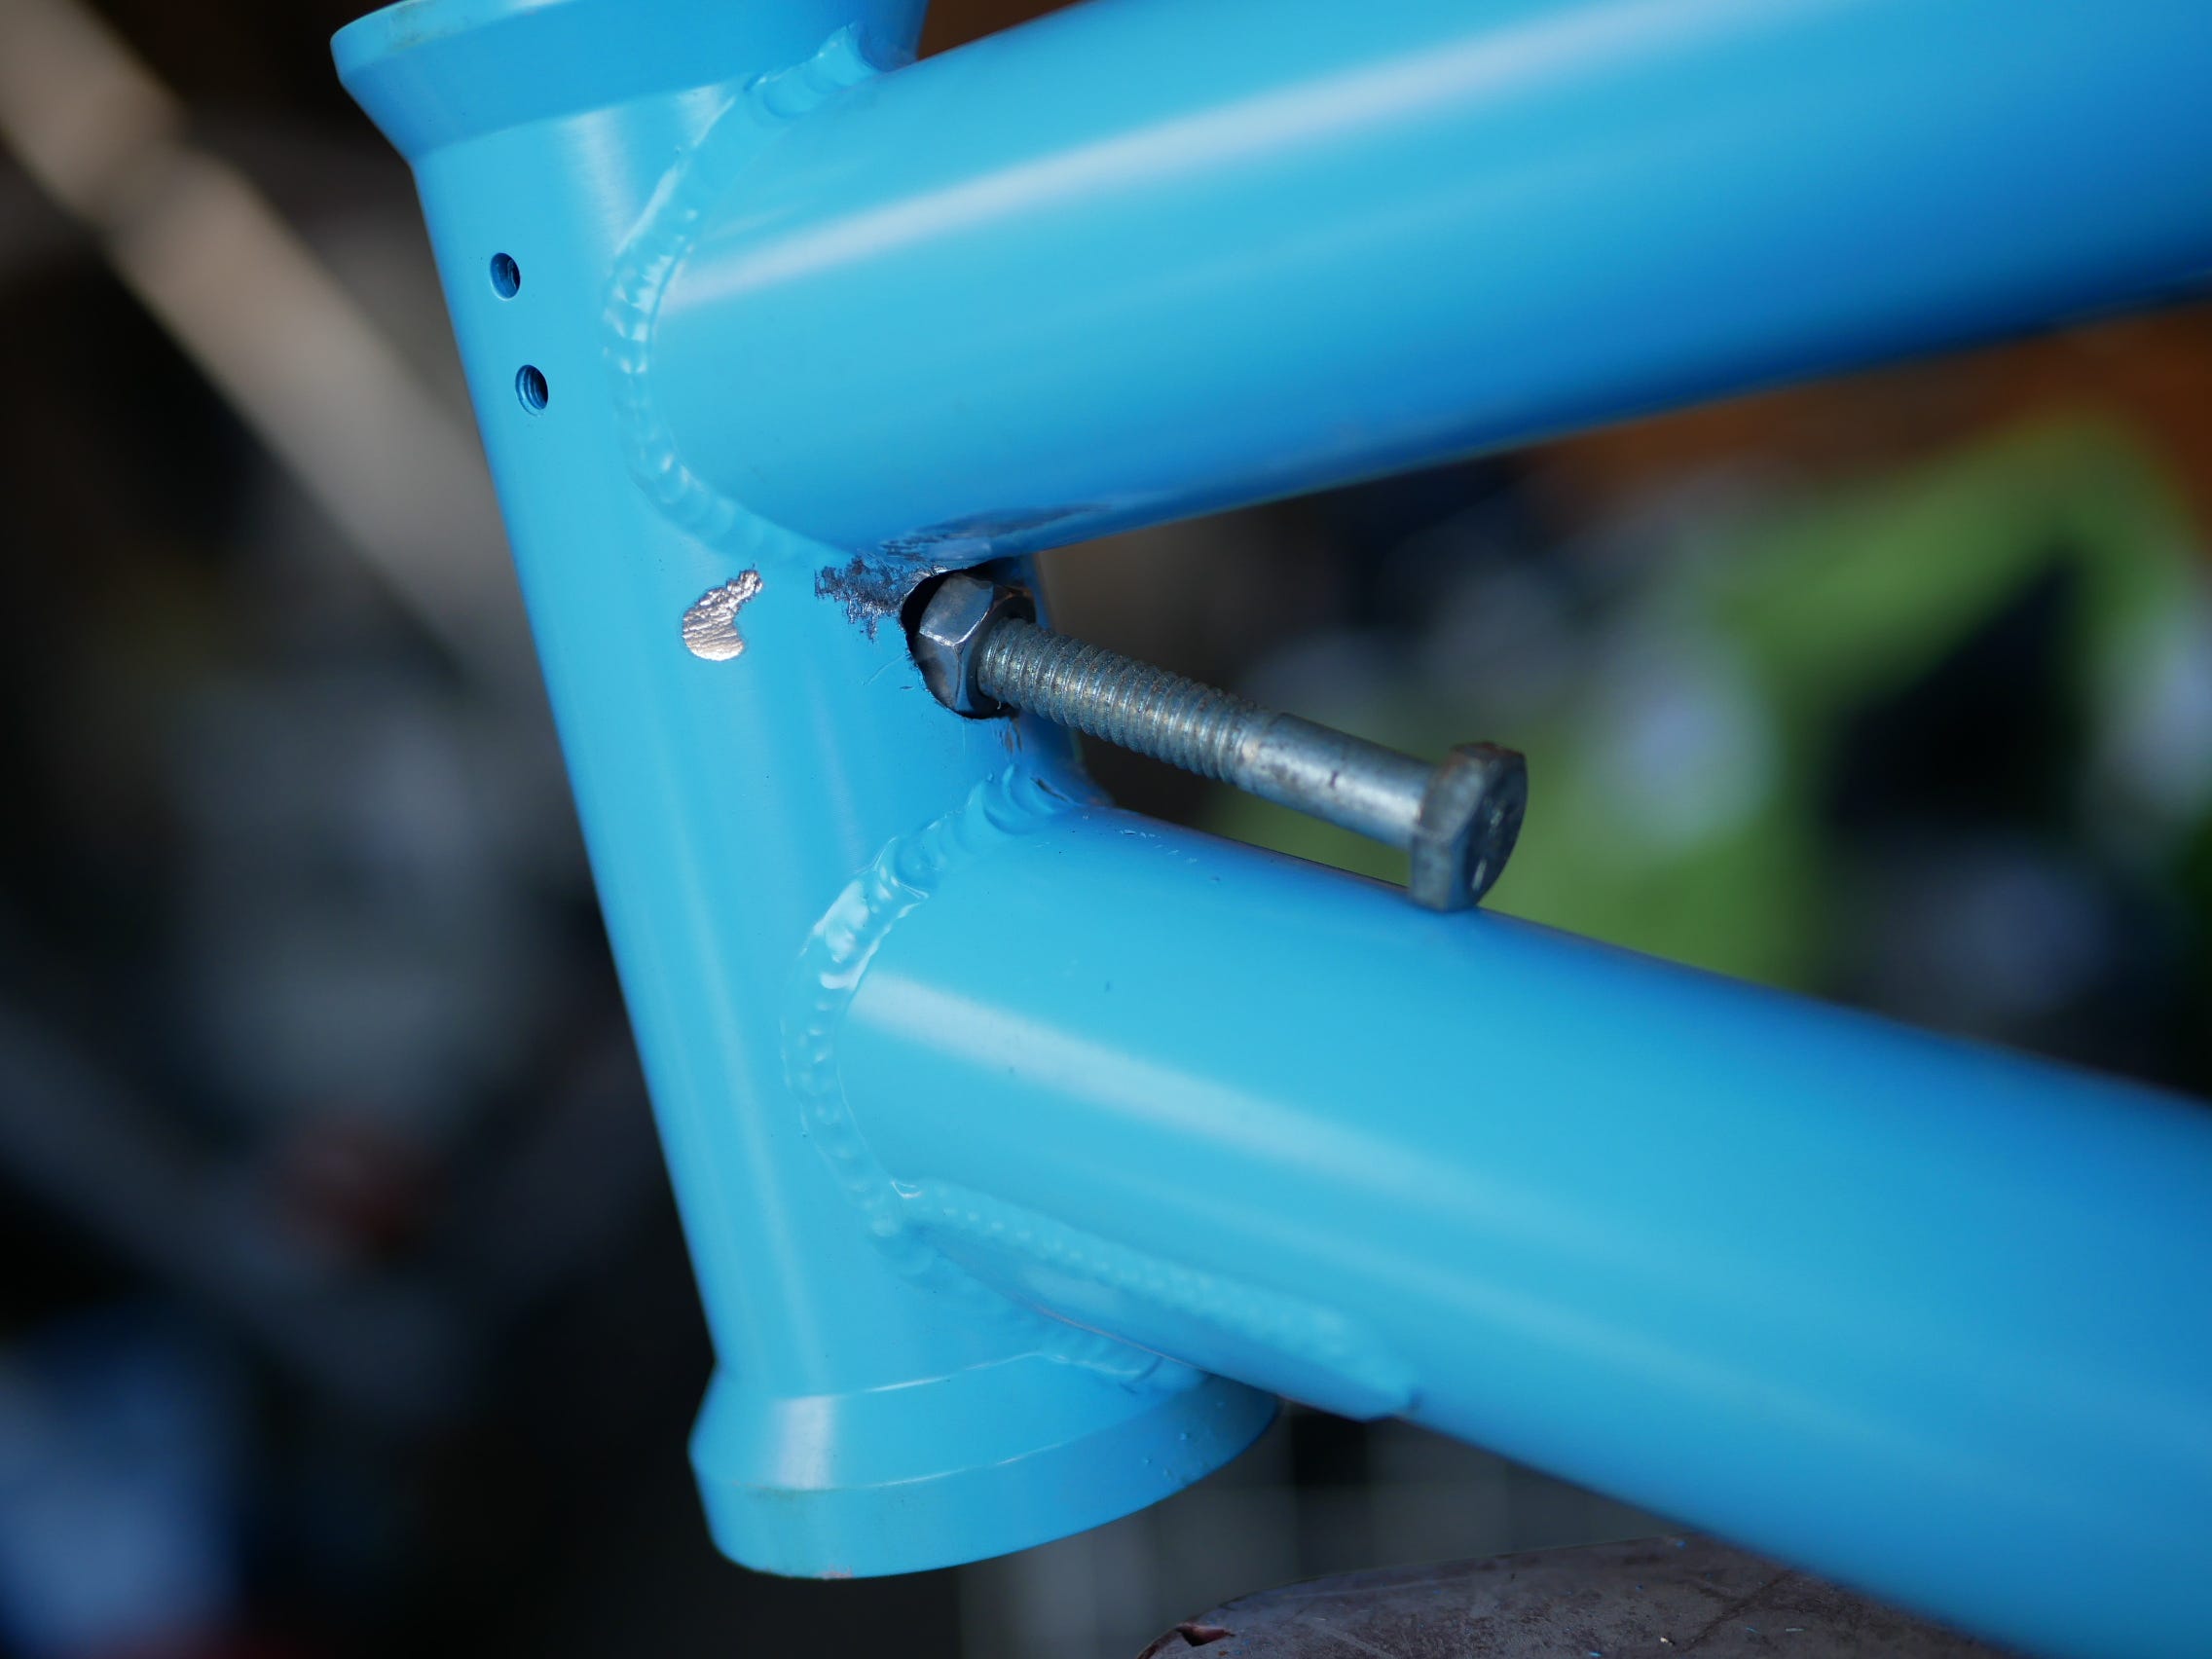
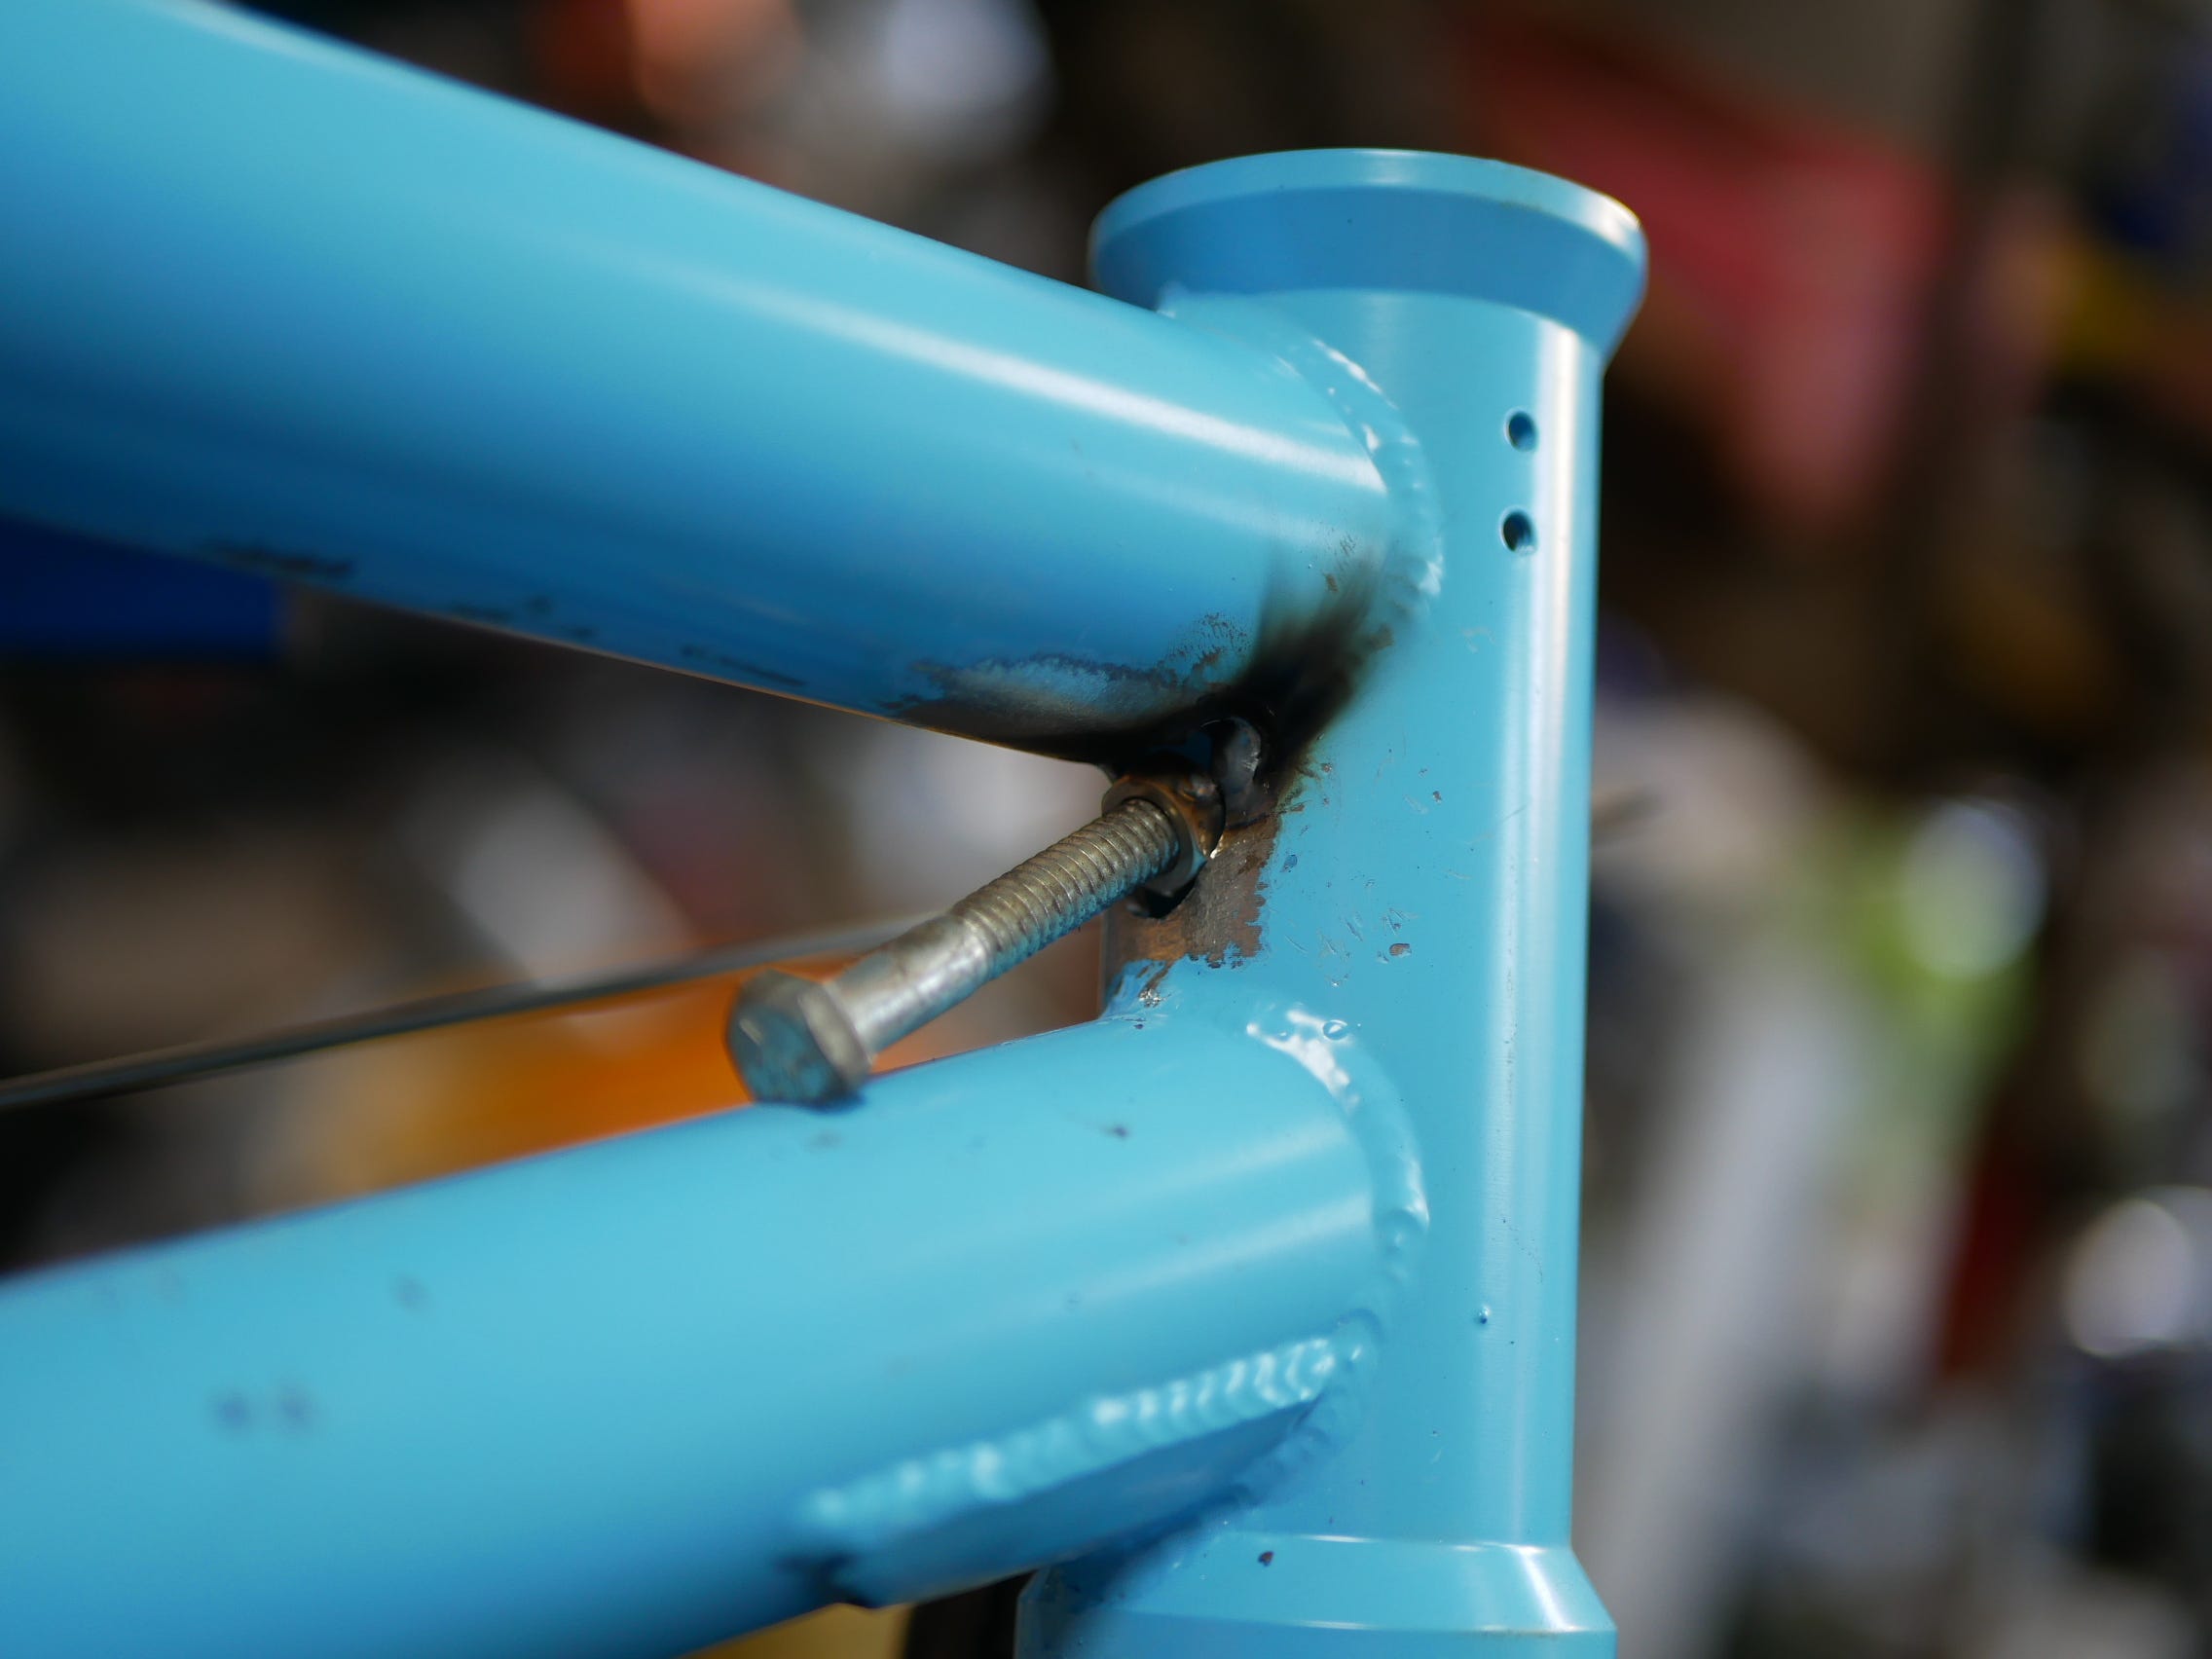
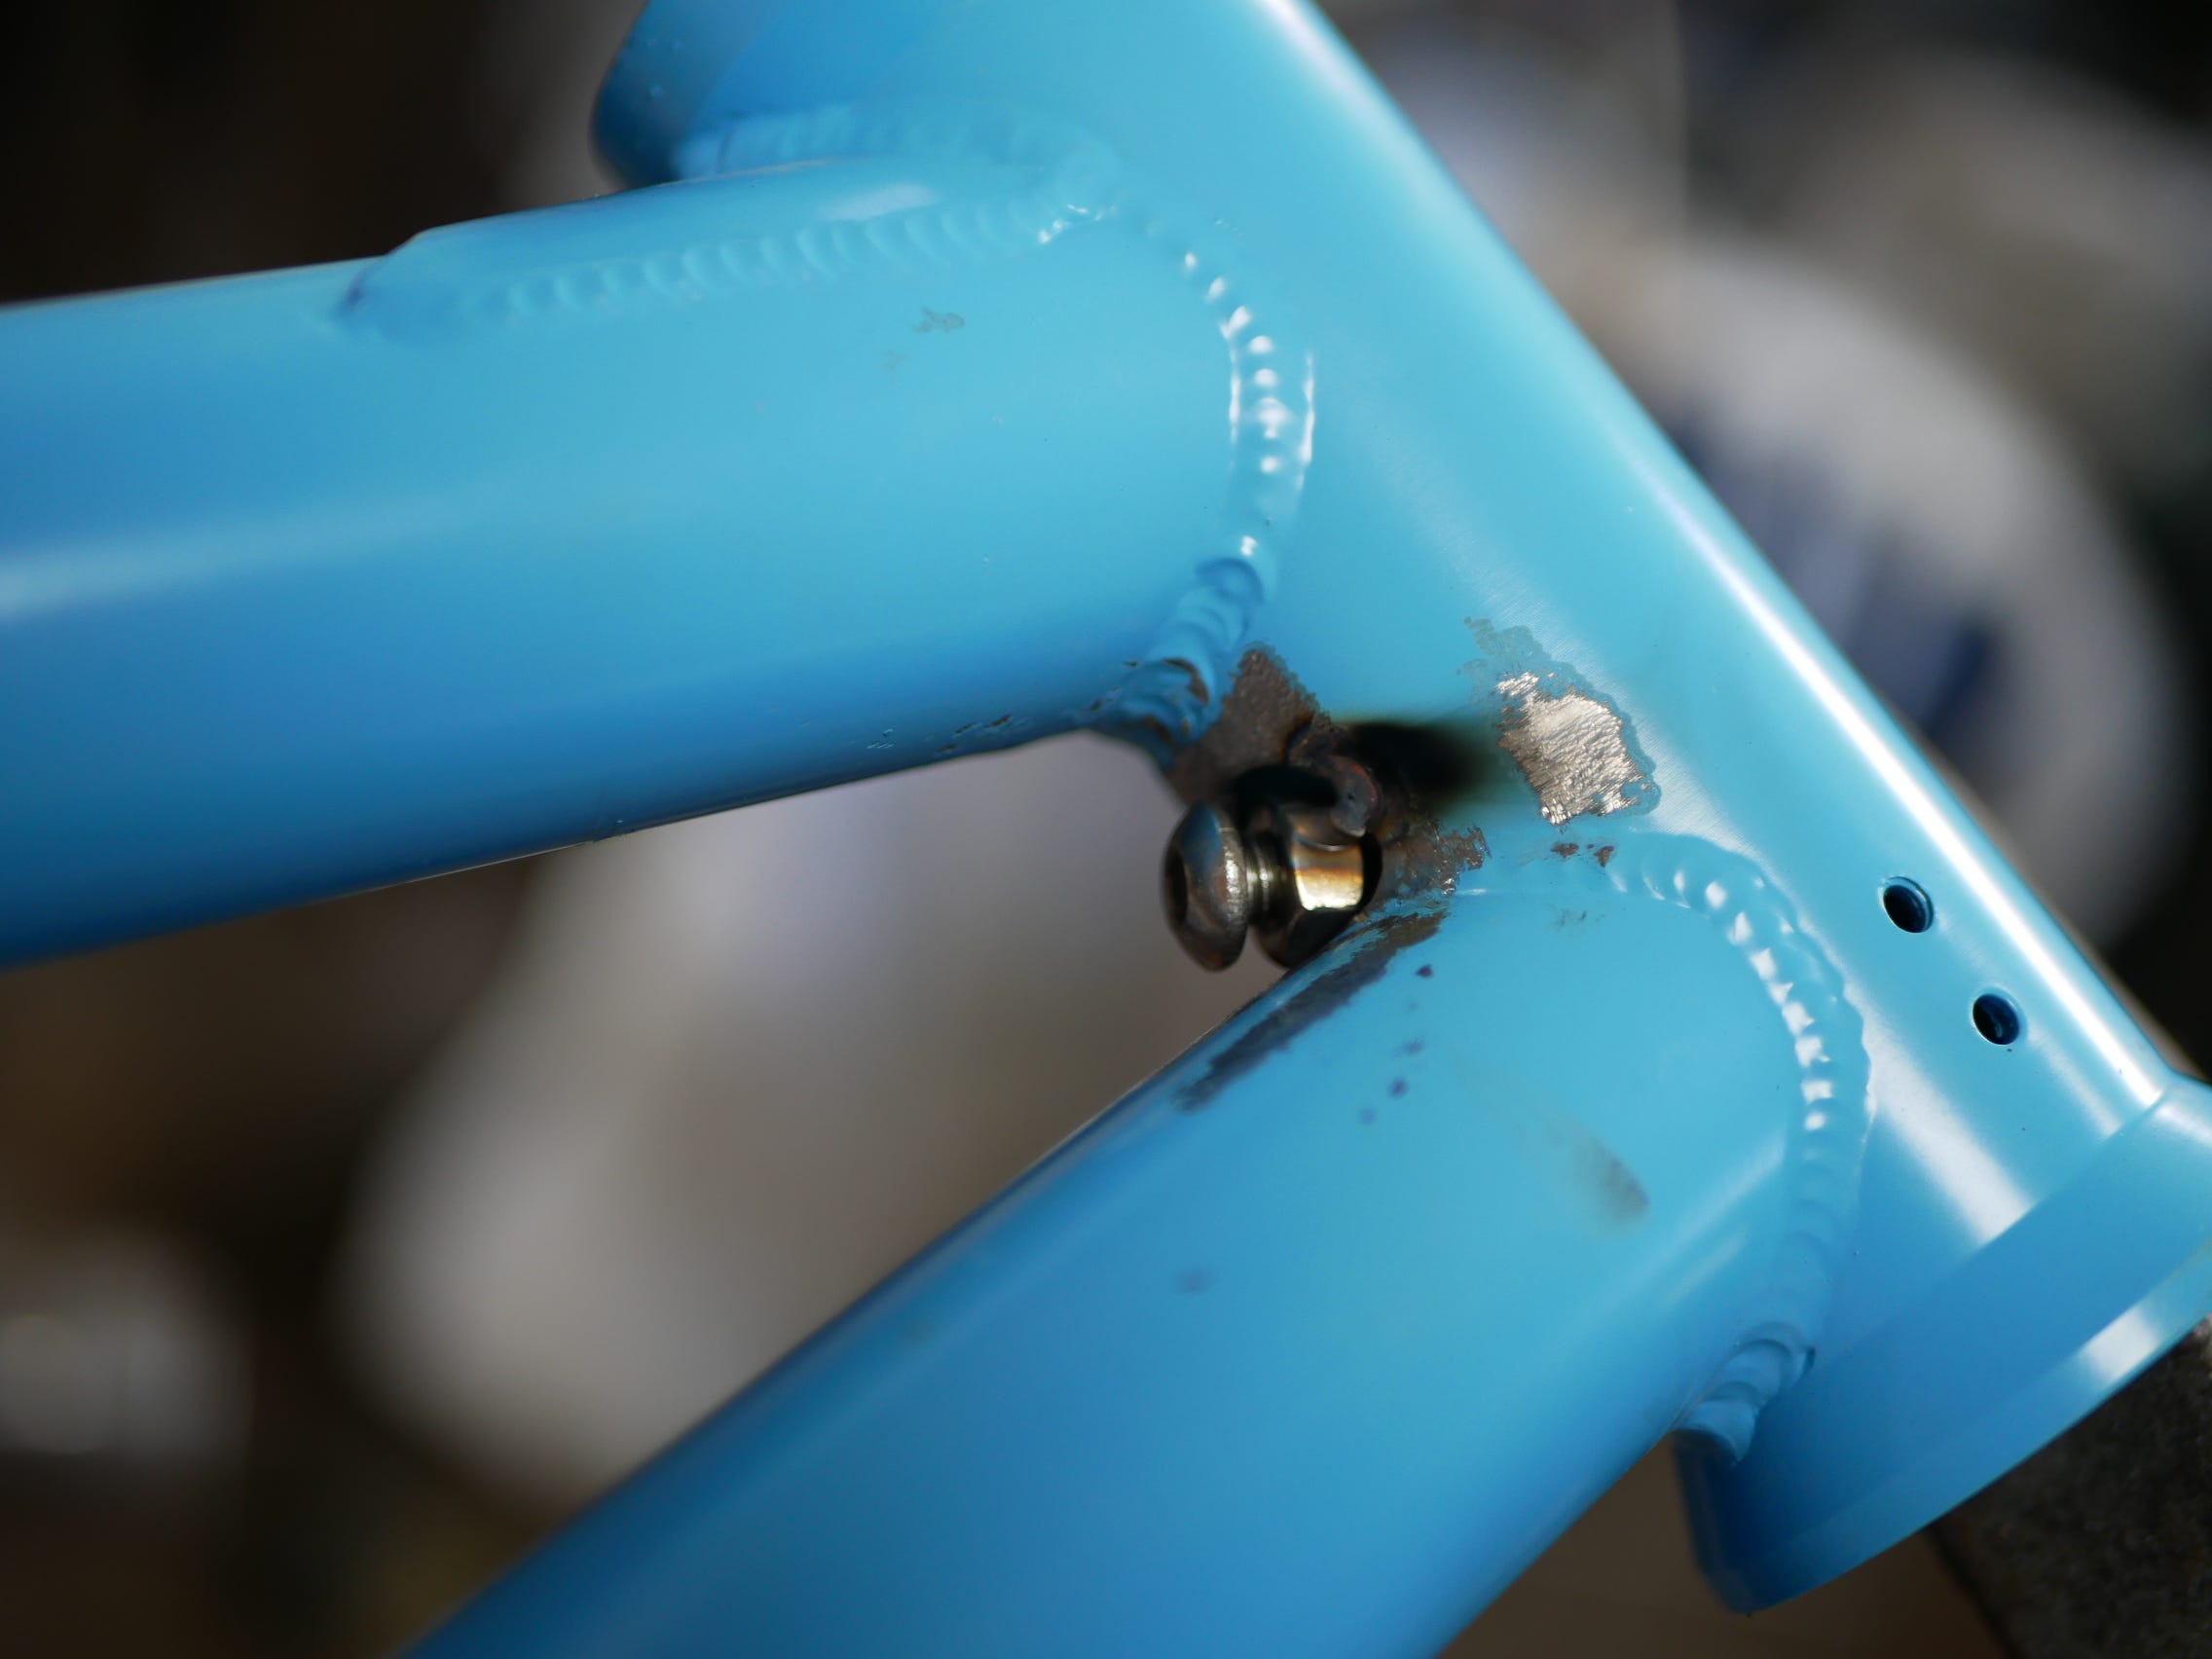
This was done so a Nut could be placed in position and checked as this was the first part of the modification needed.
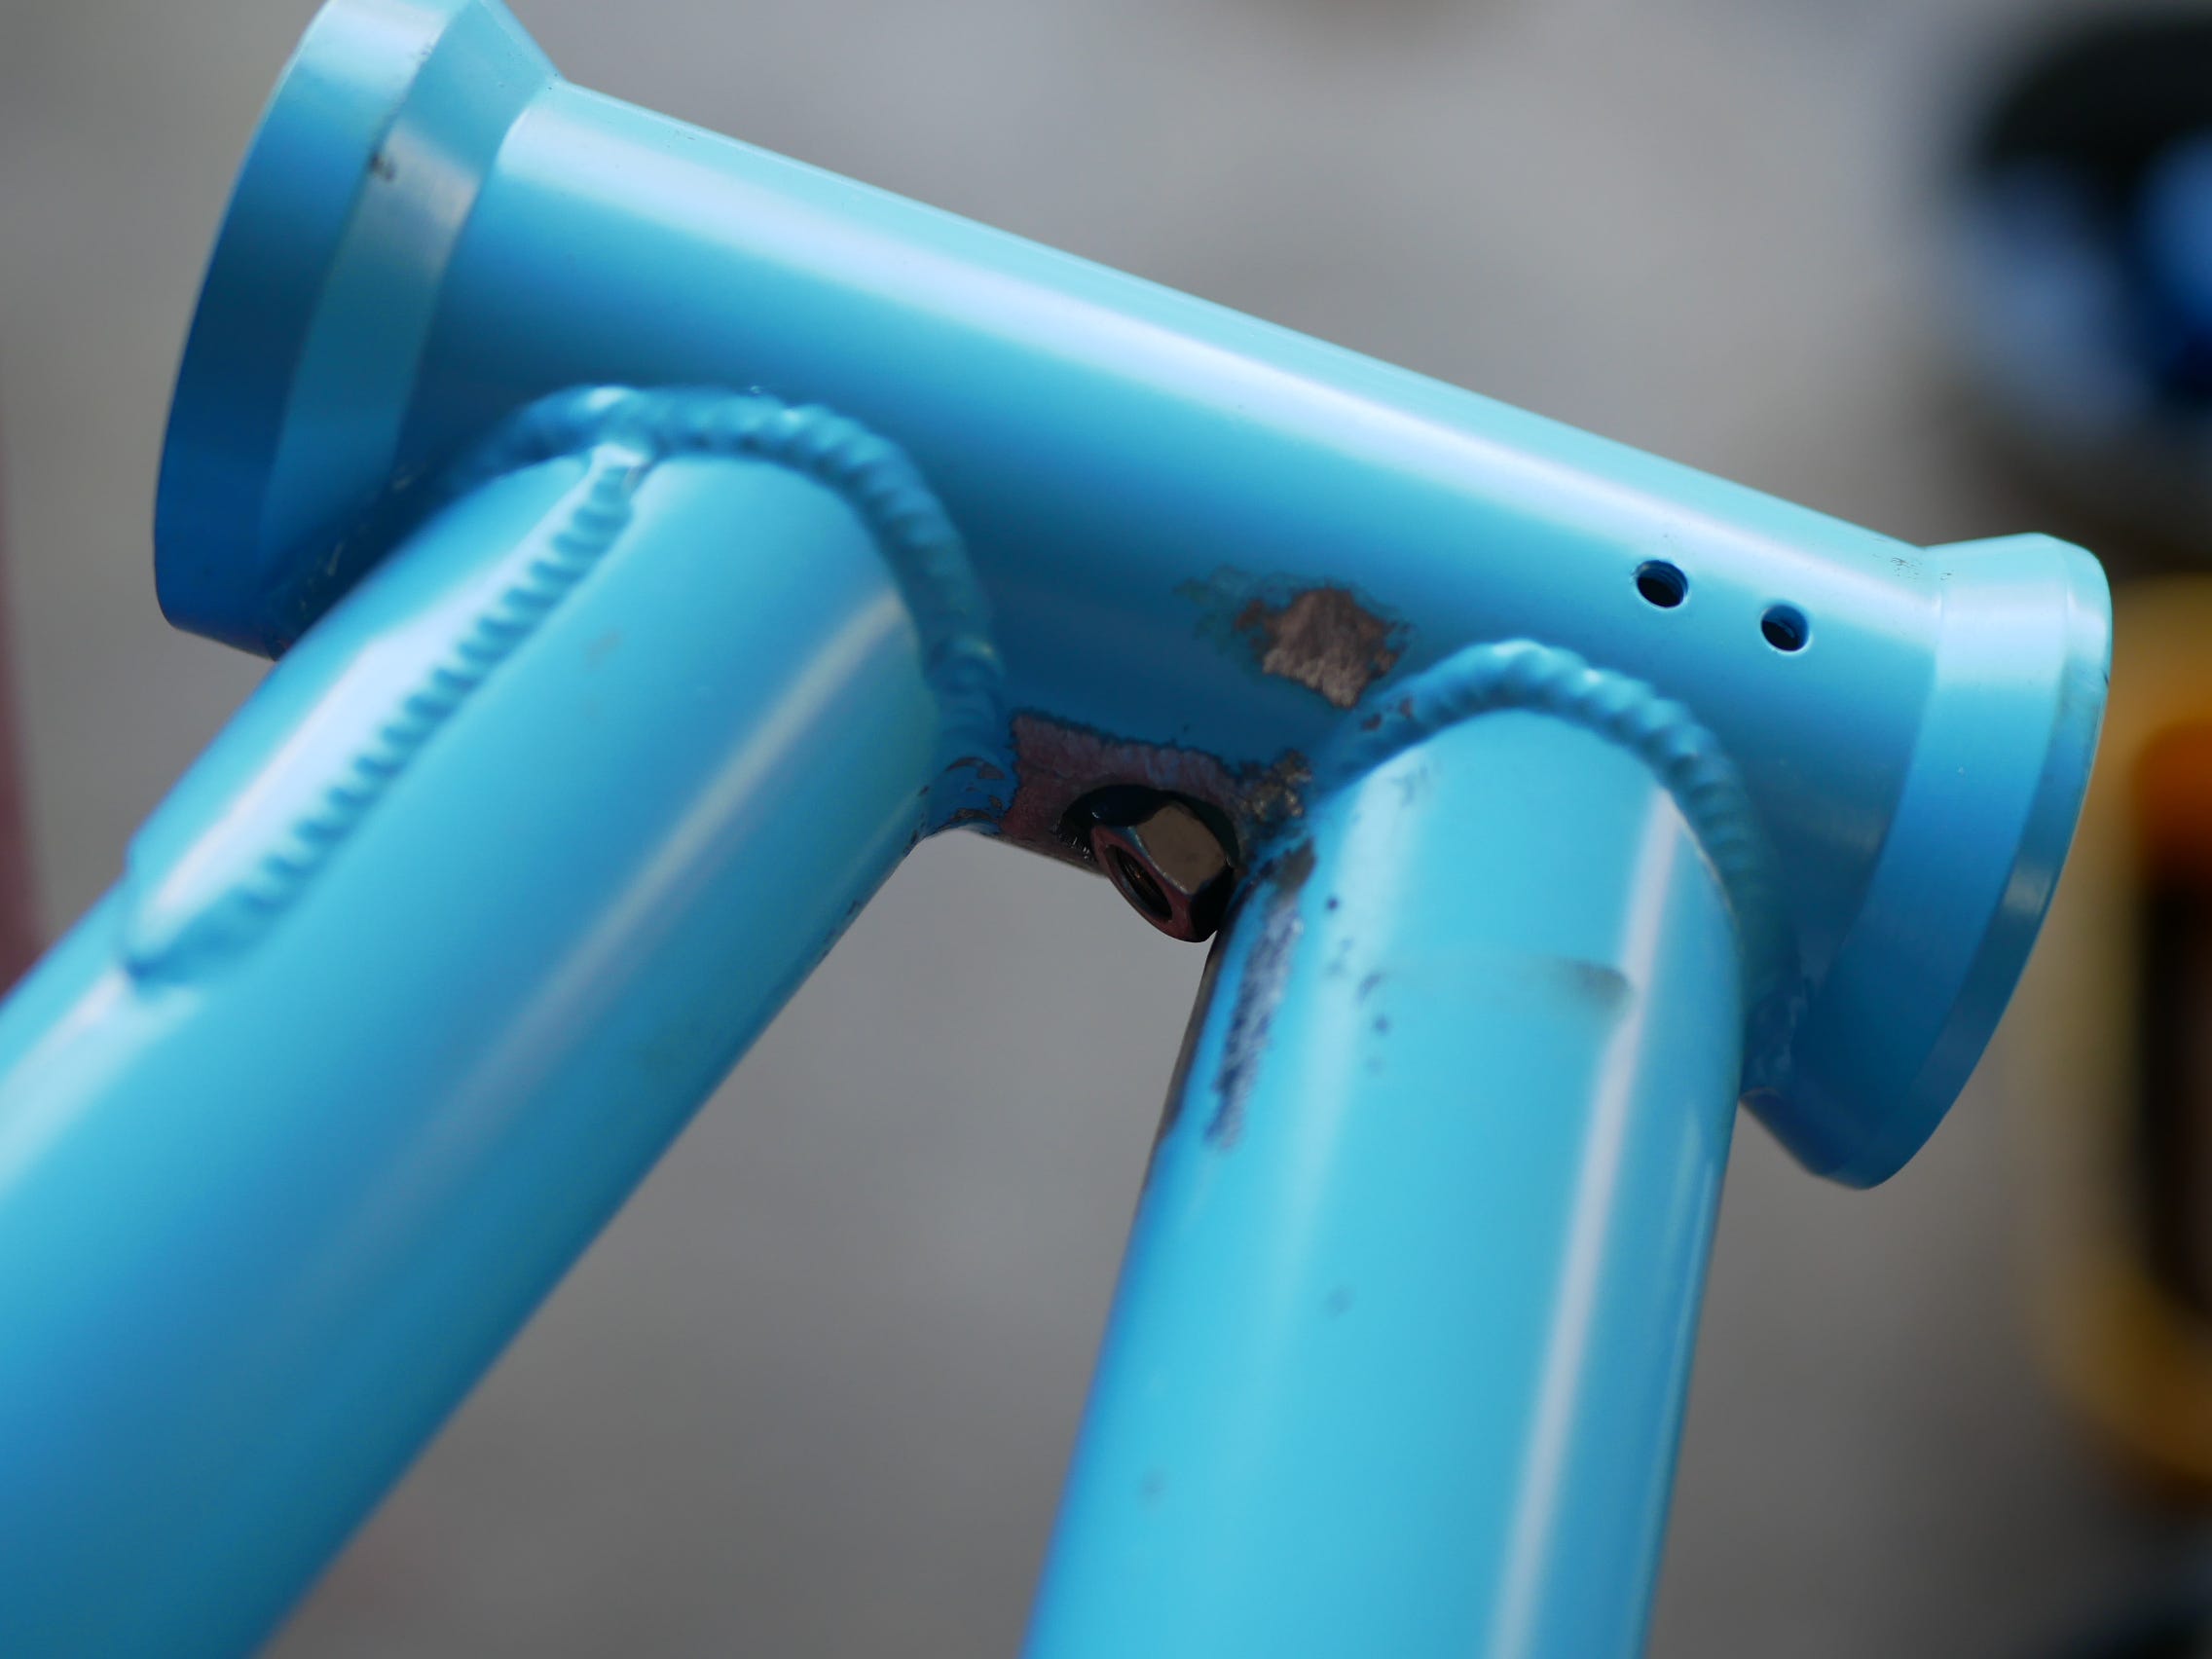
Looking quite good and as though everything would workout, it was now time to grind some more behind the head-tube so the Nut could fit in better.
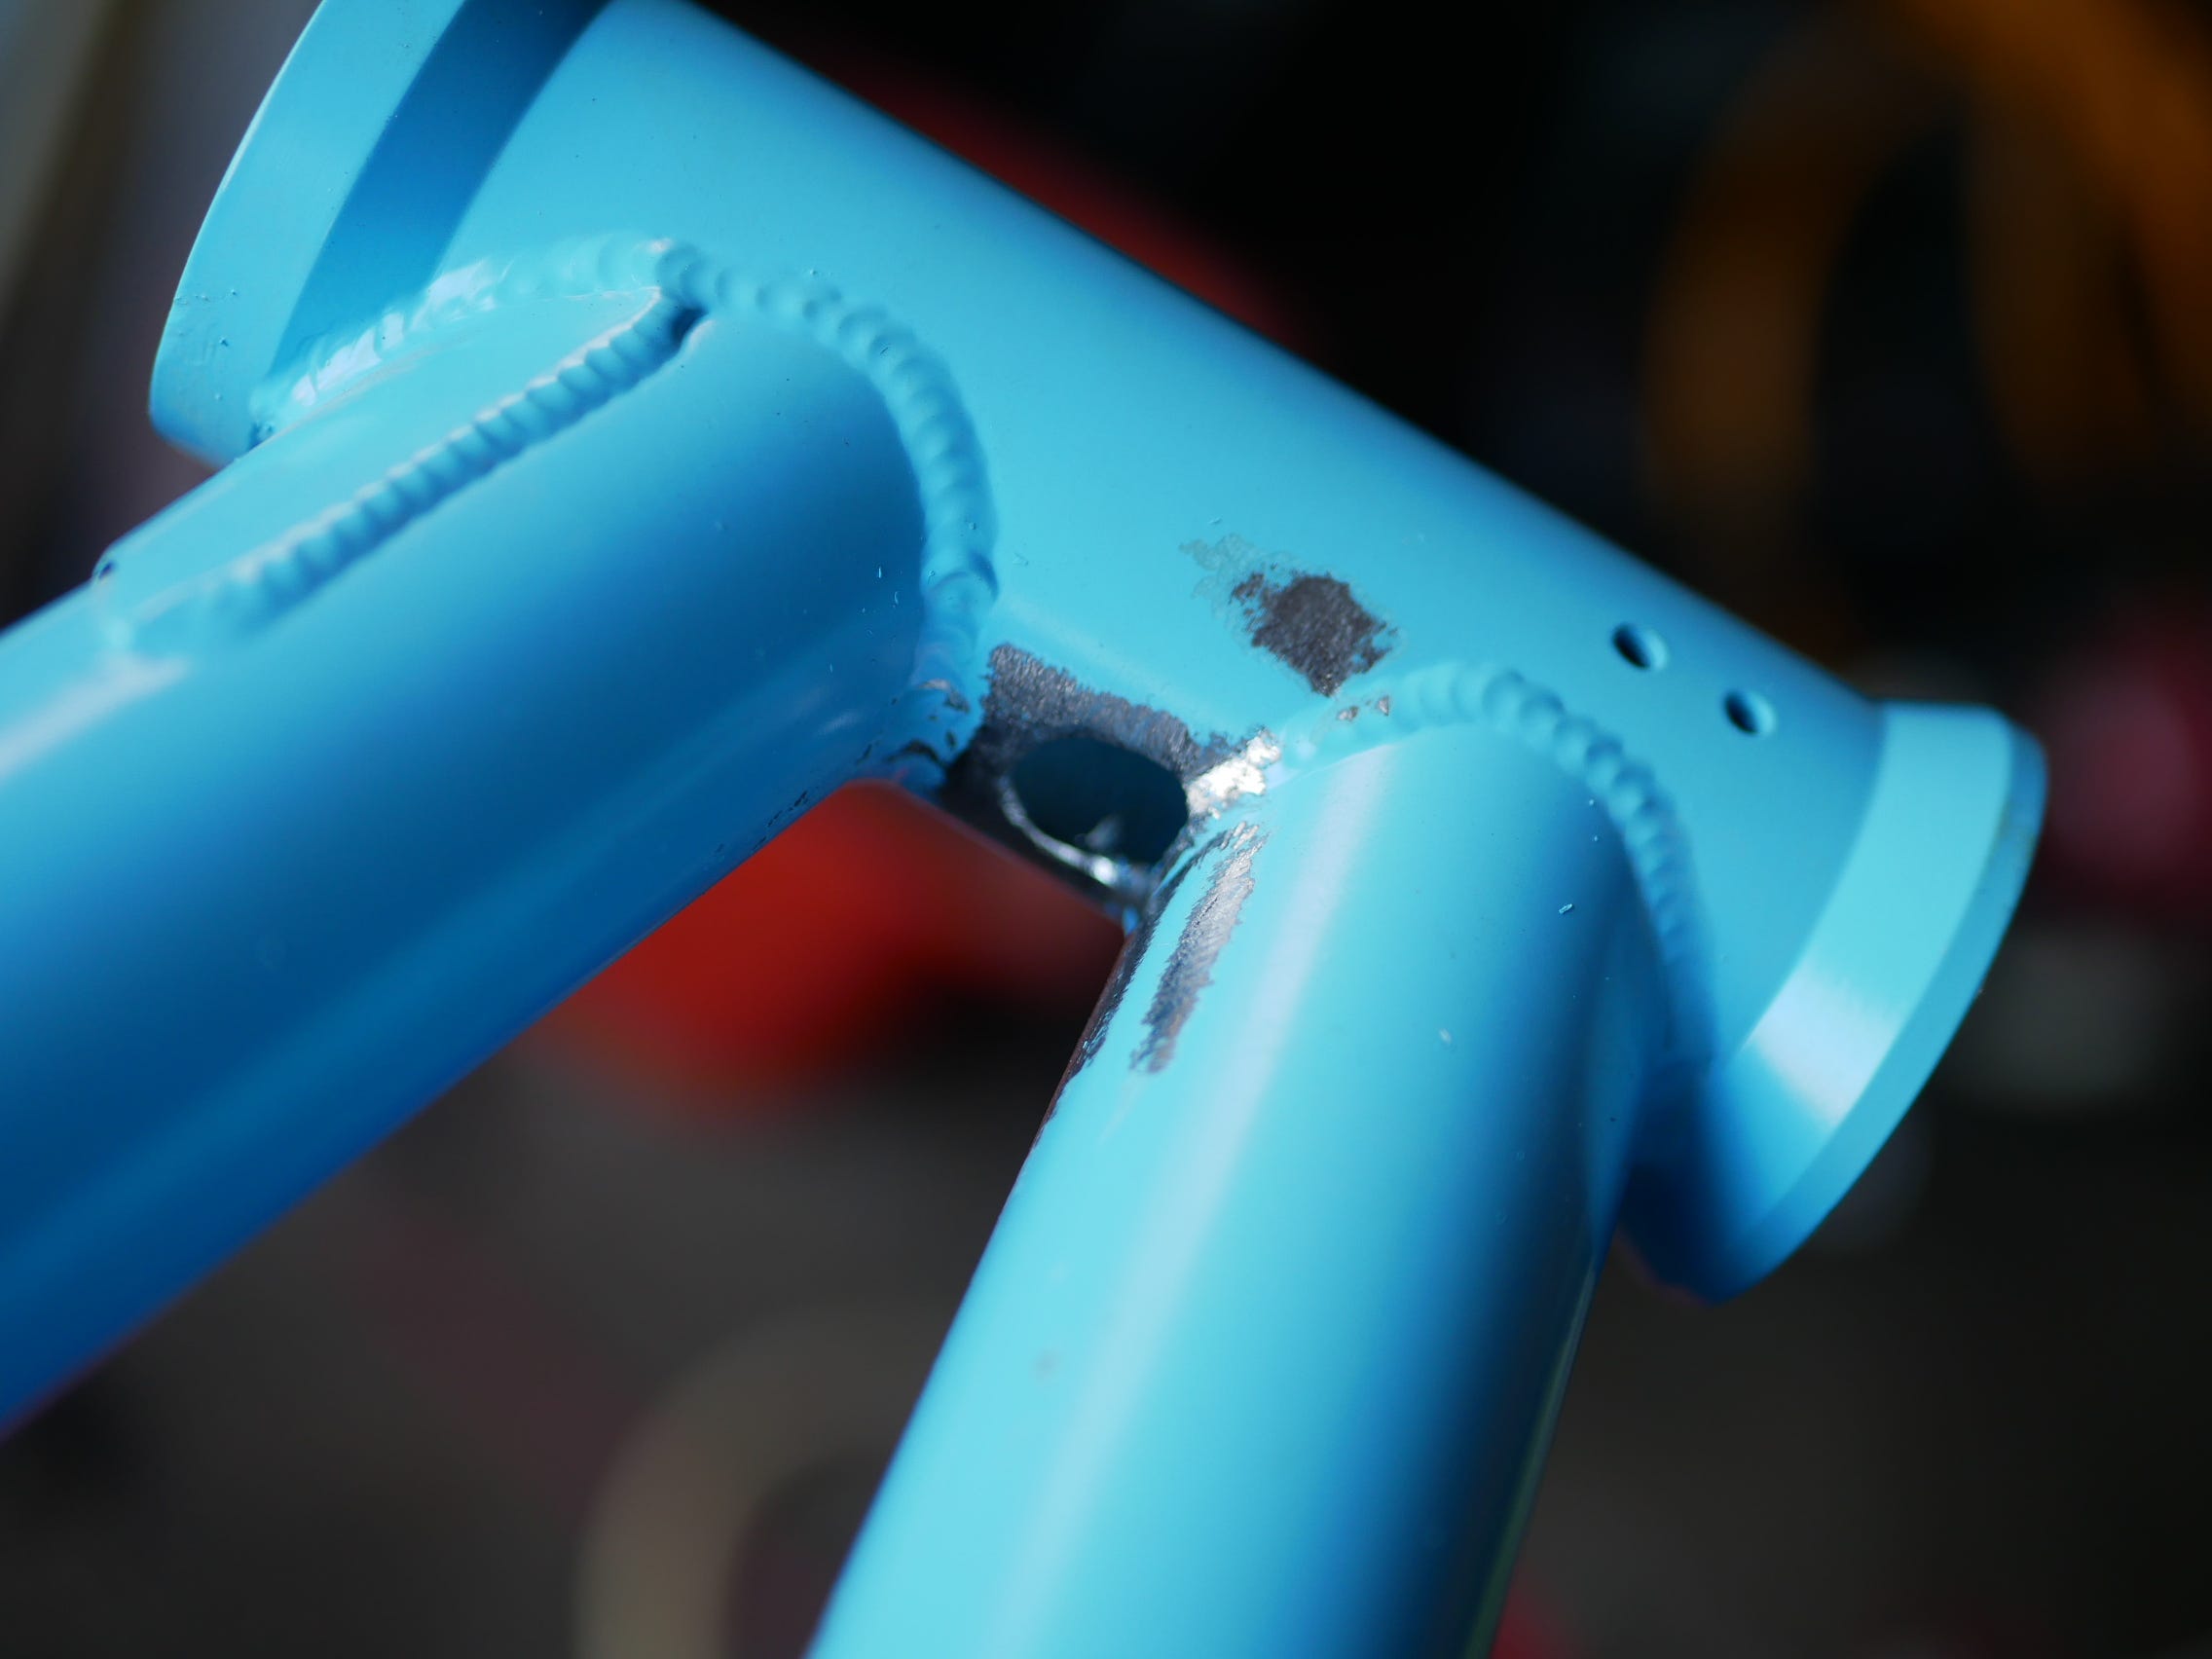
Followed by a little tack welding.
As the Nut was tacked into place, it was checked again and then soon followed by re-positioning it before some serious welding was to begin.
But being that it is a stainless nut, when welding it in, it needs to have a bolt placed inside so that the weld does not disturbs the threads.
So as a handy hint, it is best to place a Bolt into the Nut with some lube or grease so that the Bolt does not bind to the Nut and the threads of the Nut are not damaged by the Weld.
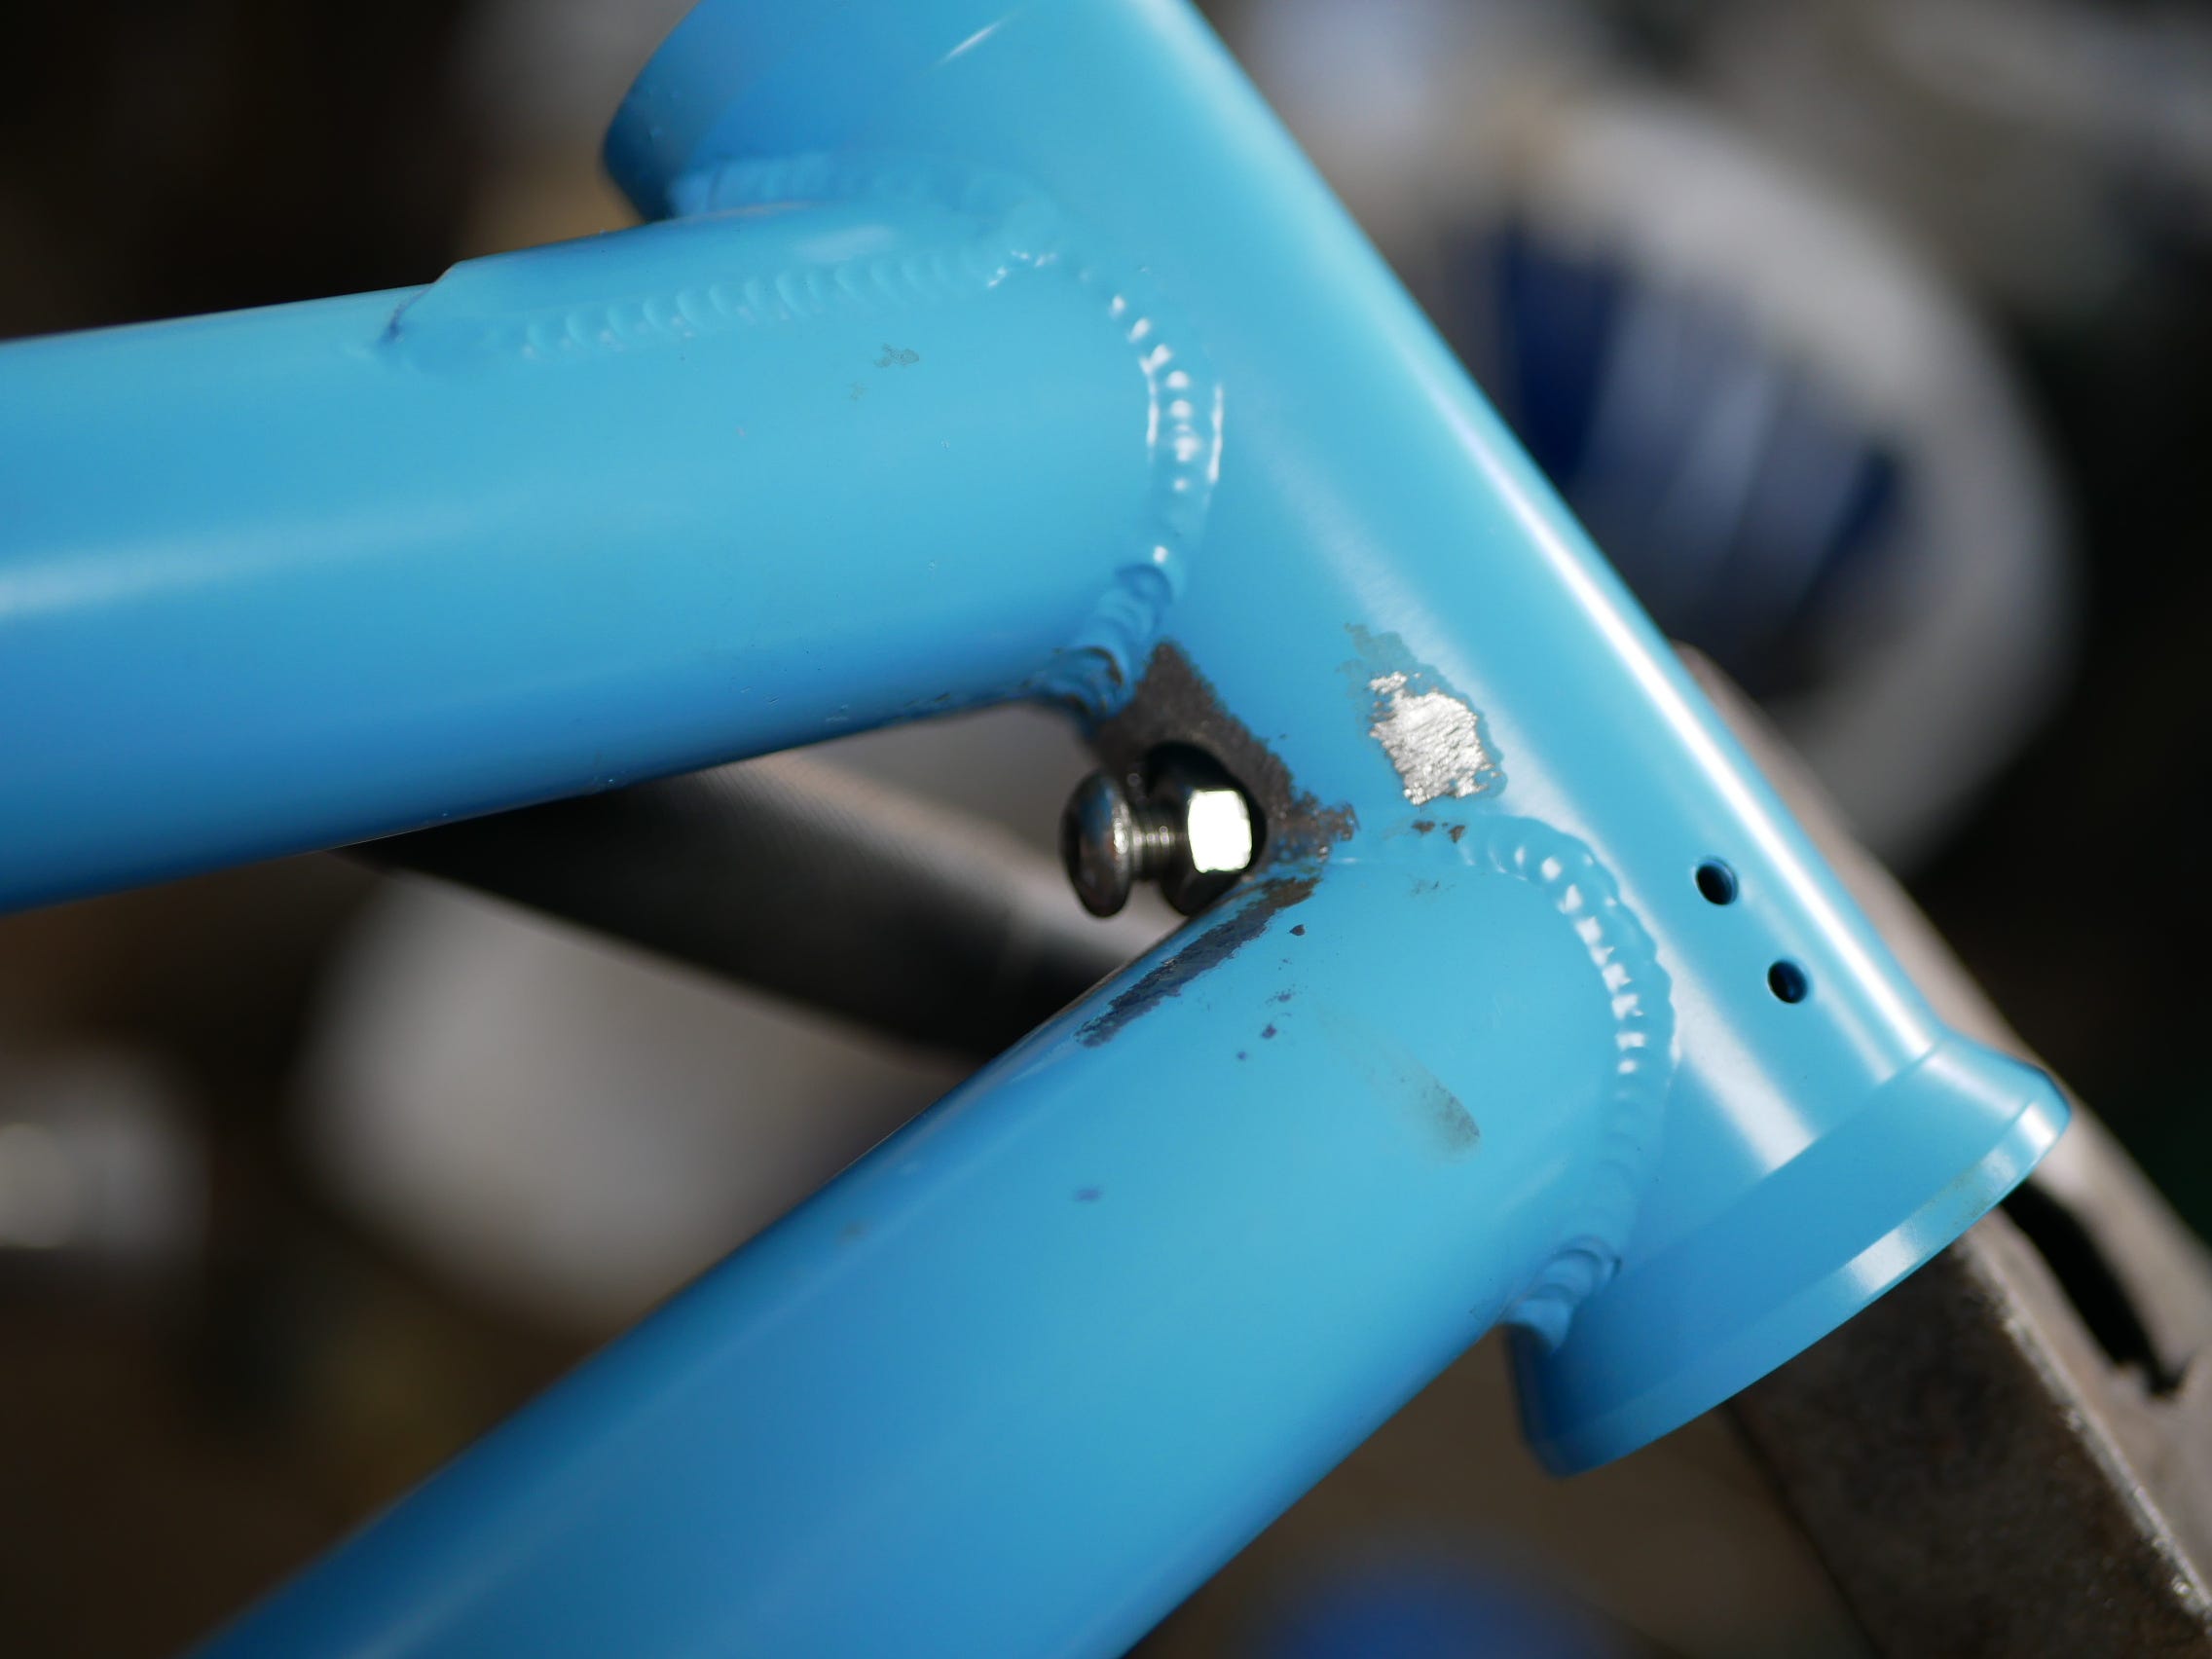
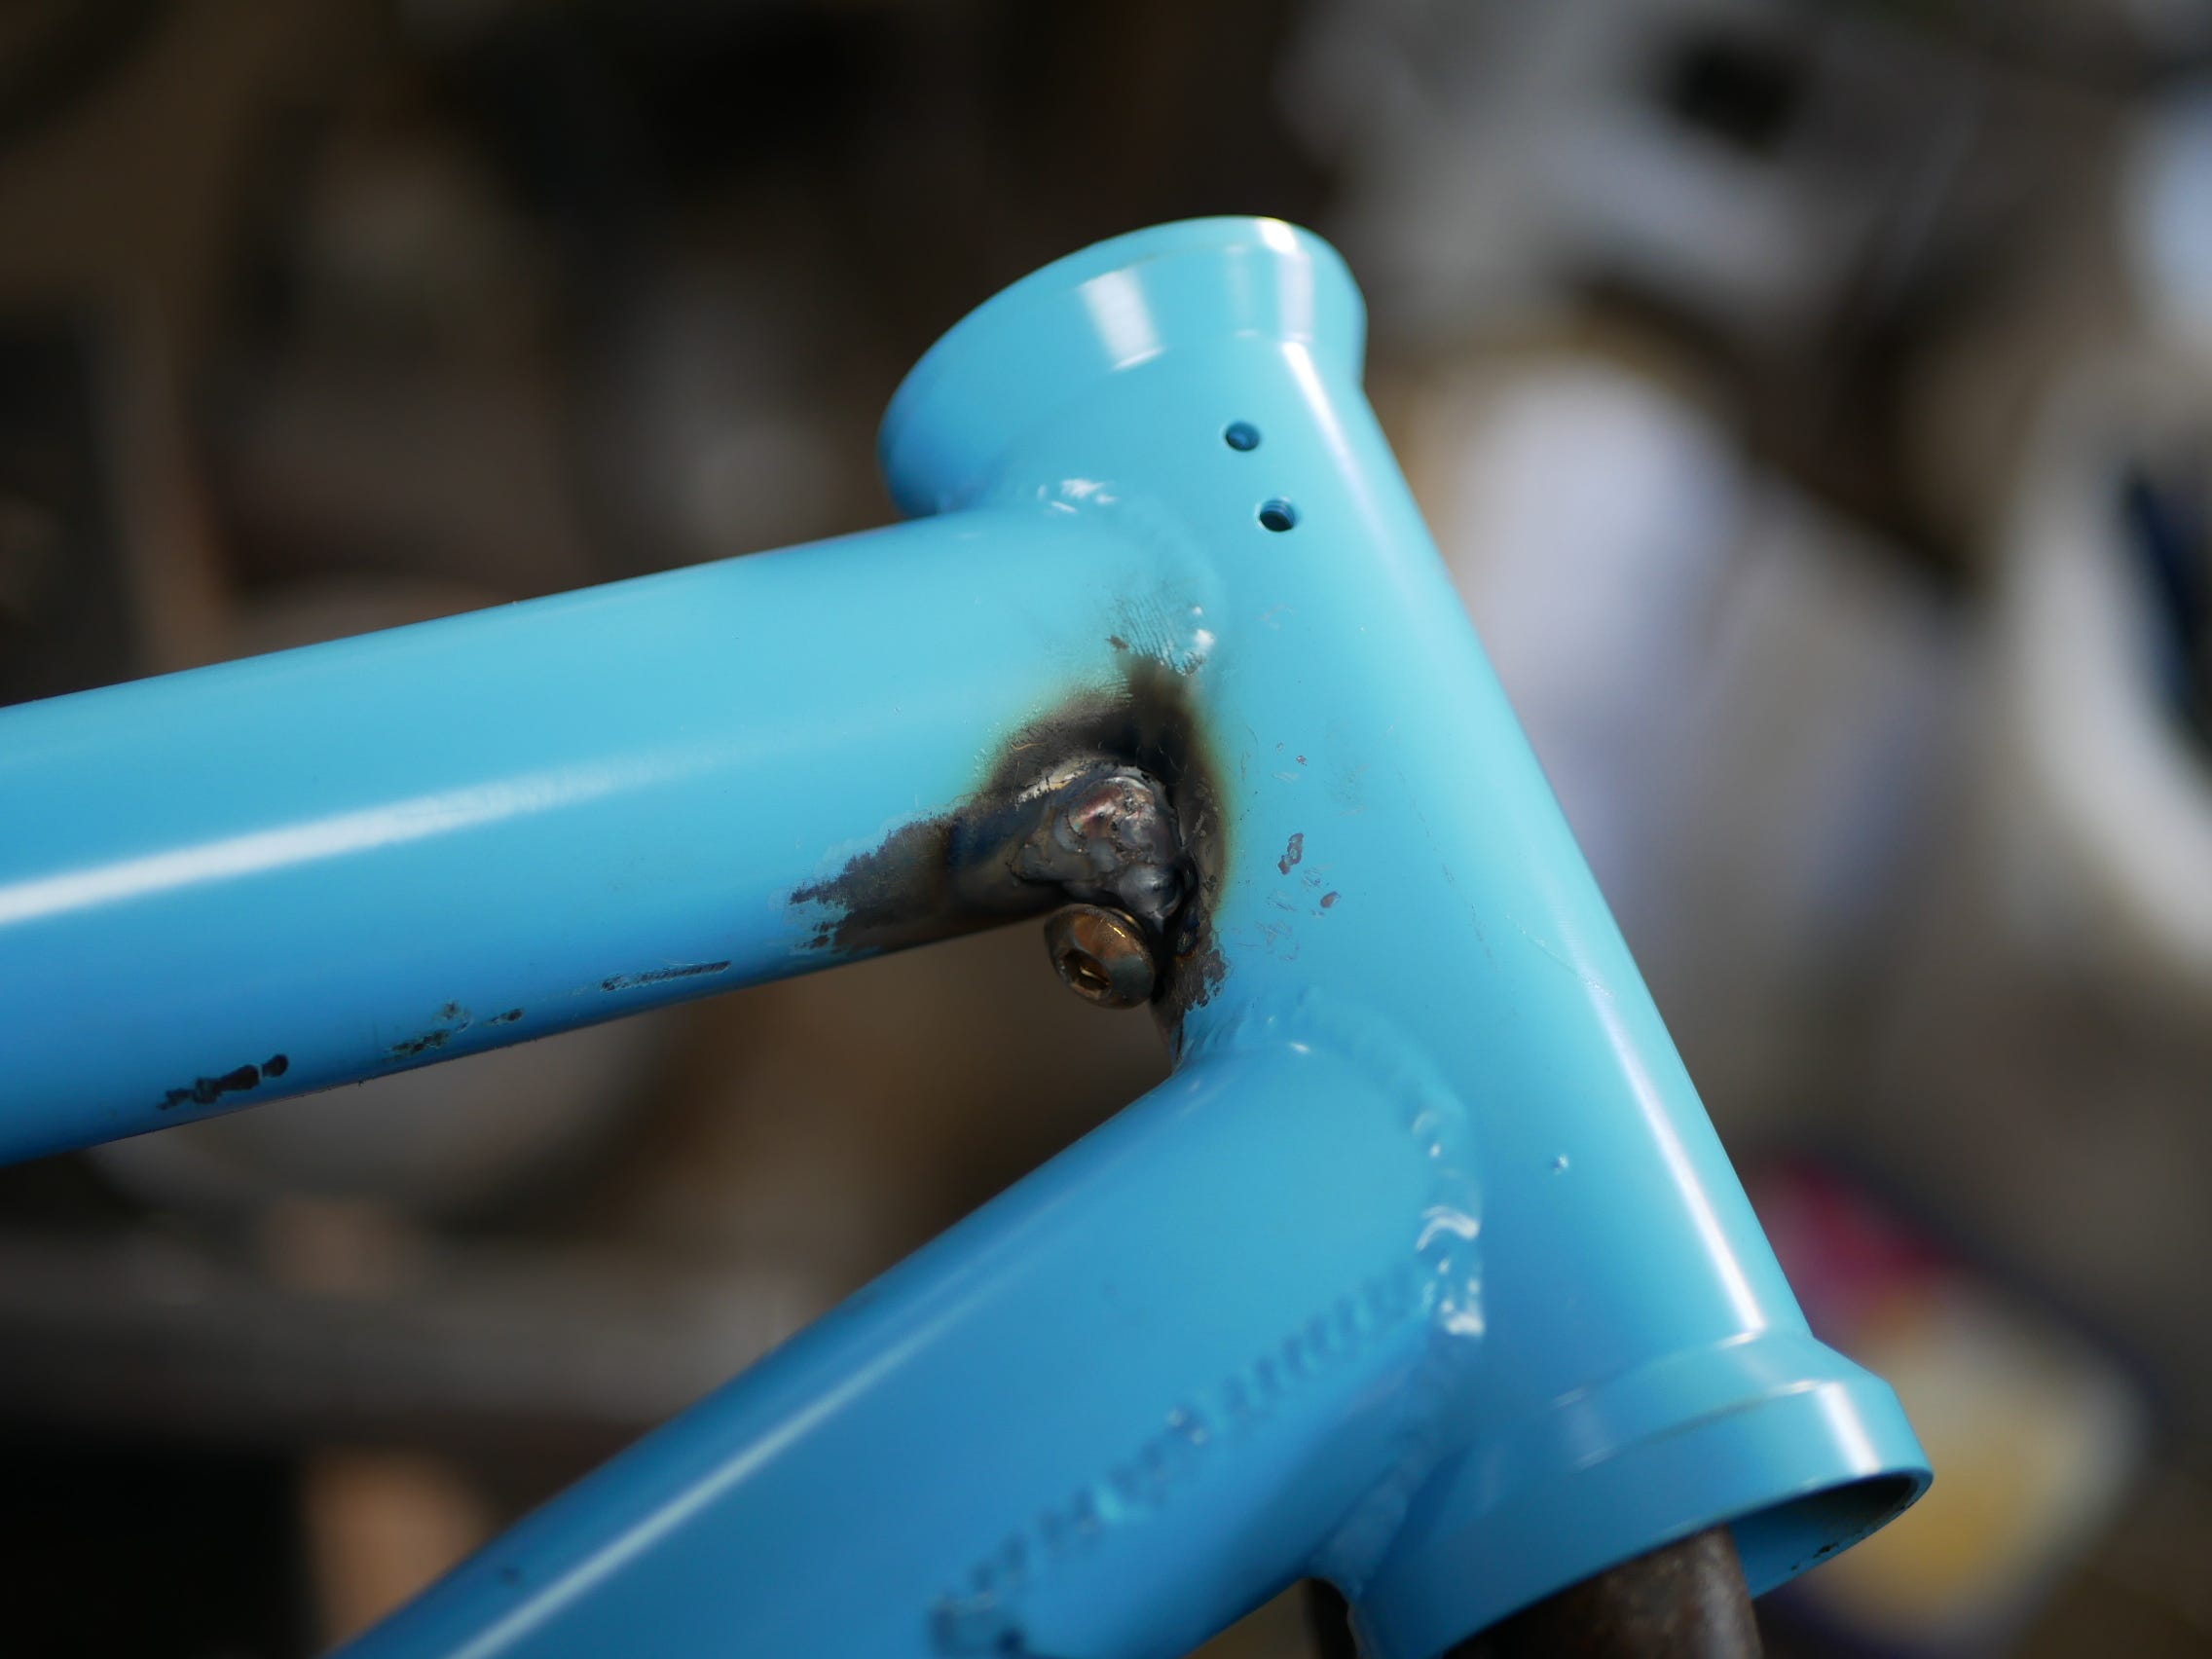
However, I did One Big, Big Mistake, you should Never Weld a Stainless Nut with a Stainless Bolt inside otherwise it is most likely to bind up in which this case it almost did.
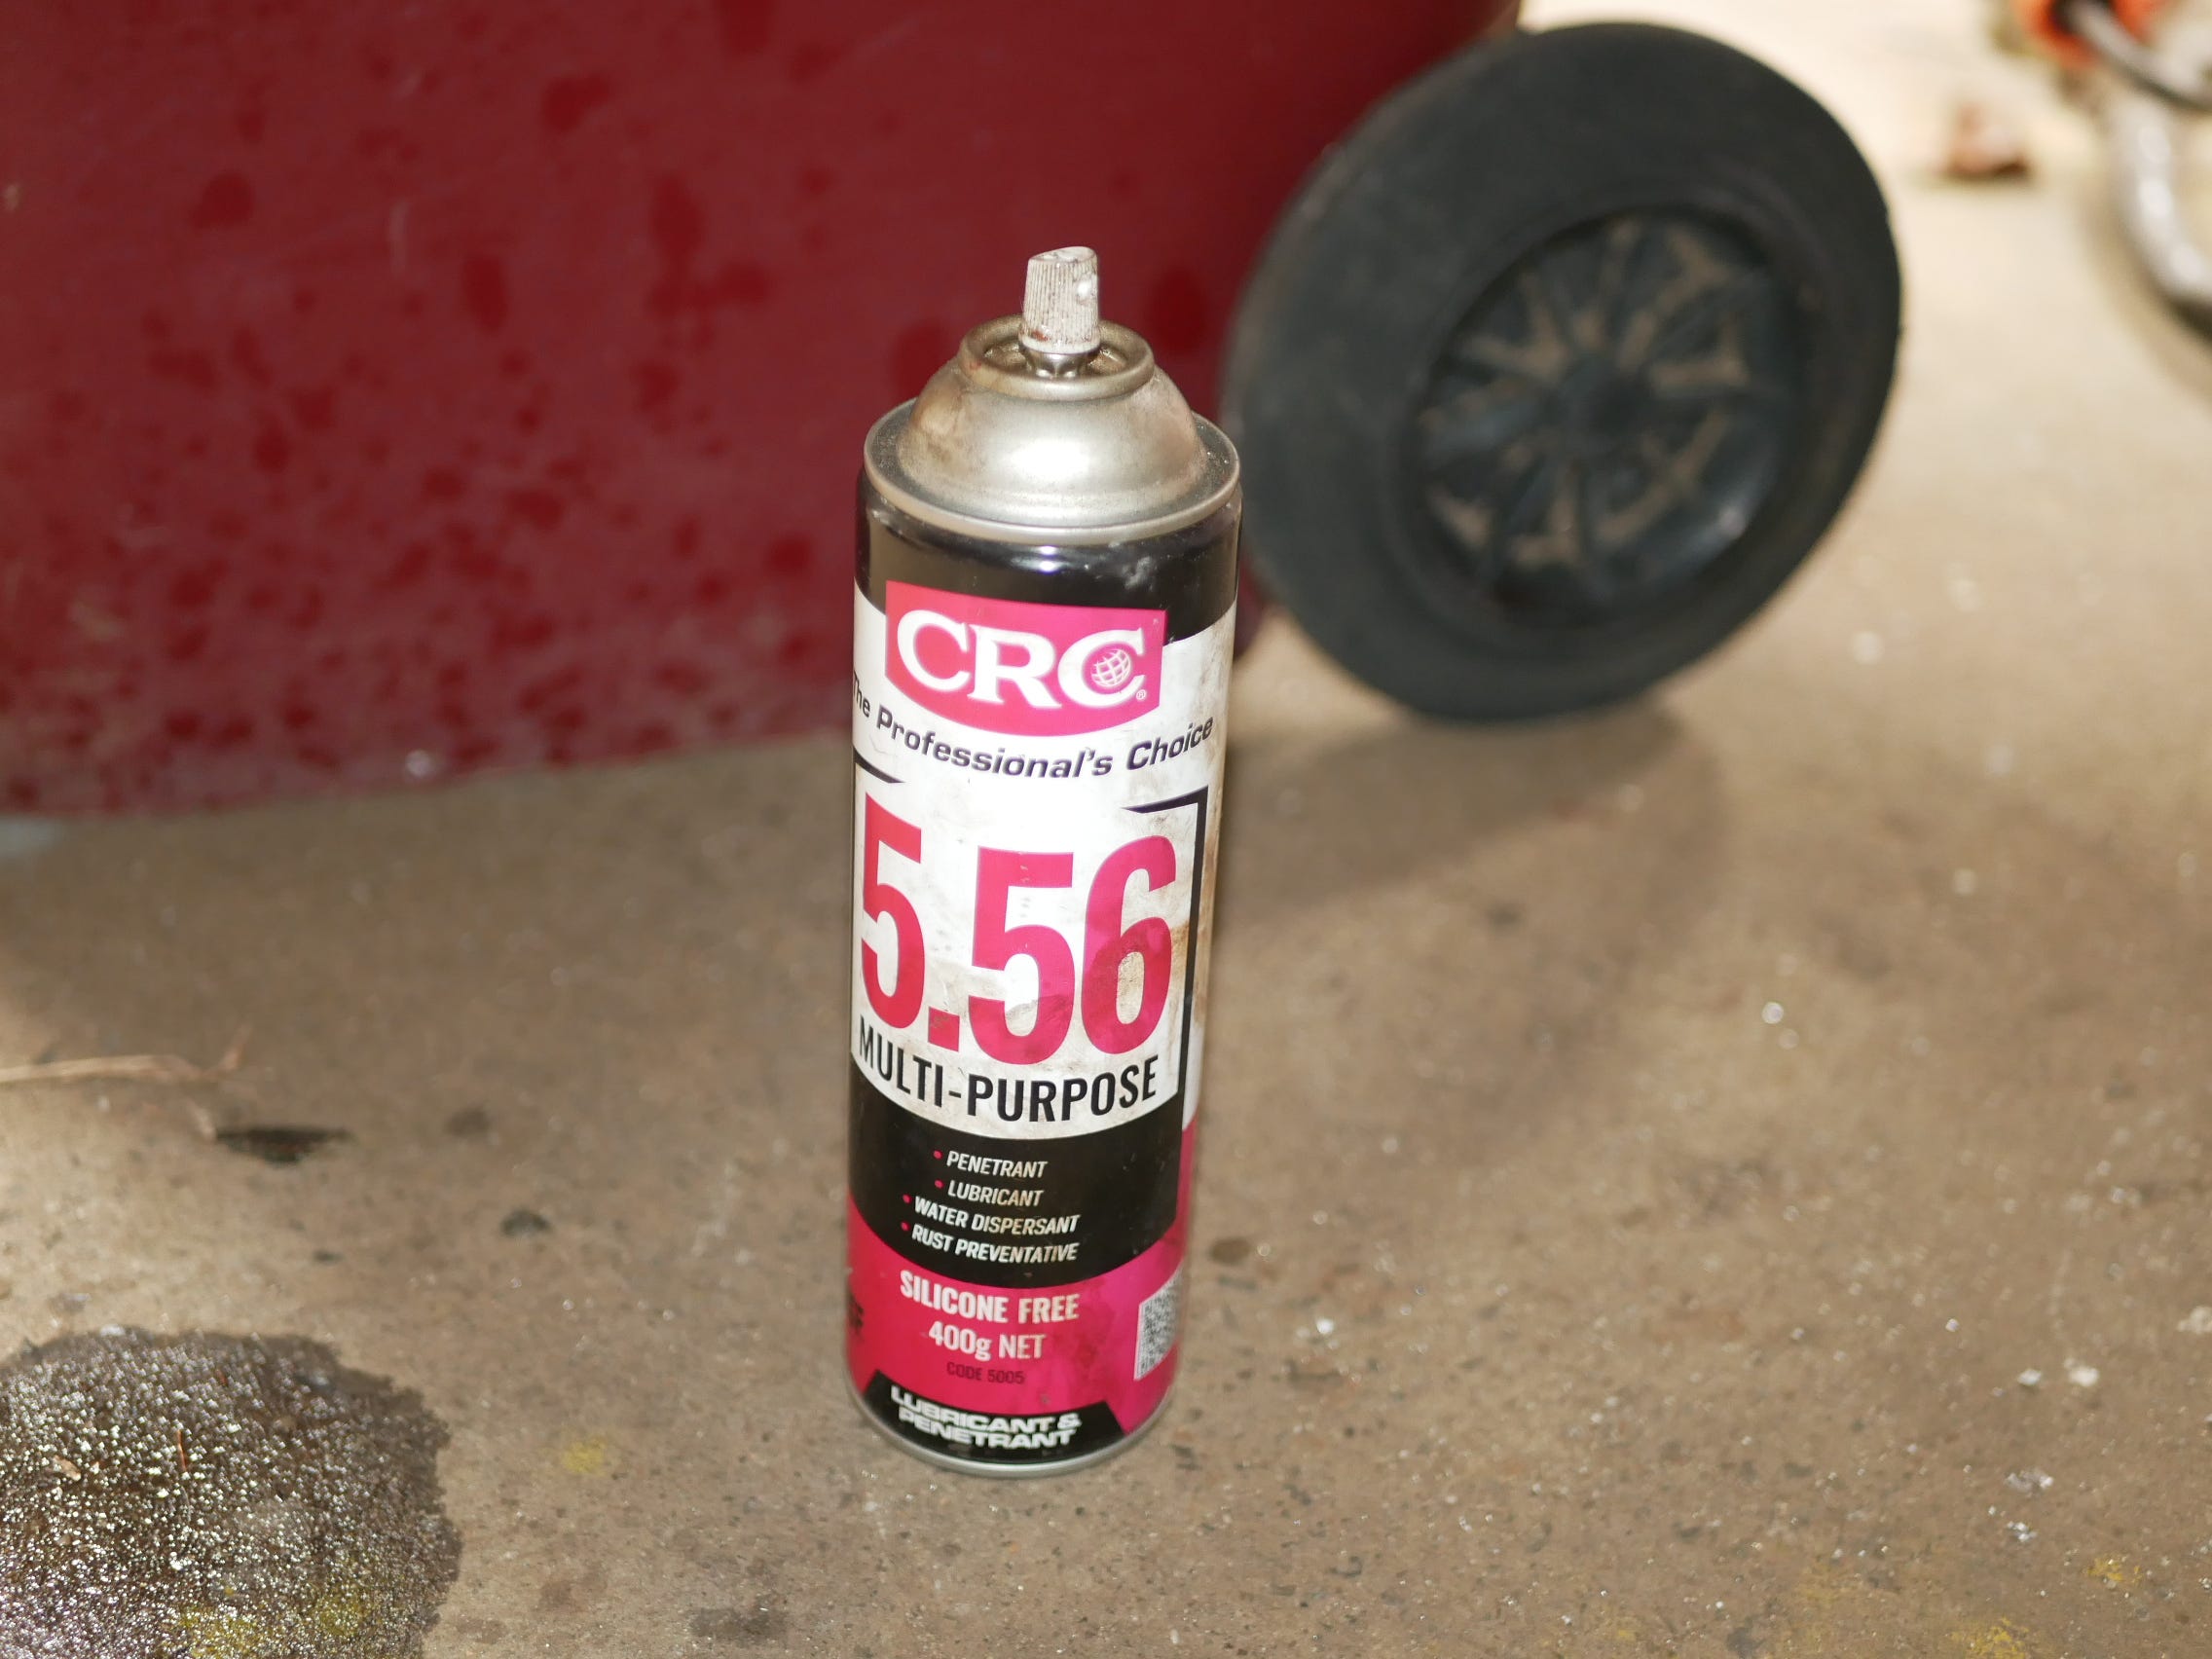
So I had to use CRC Spray to spray on the Bolt and Nut and allow it to do its thing.
After leaving it hanging overnight for quite a few days, it was time to see what could be done.
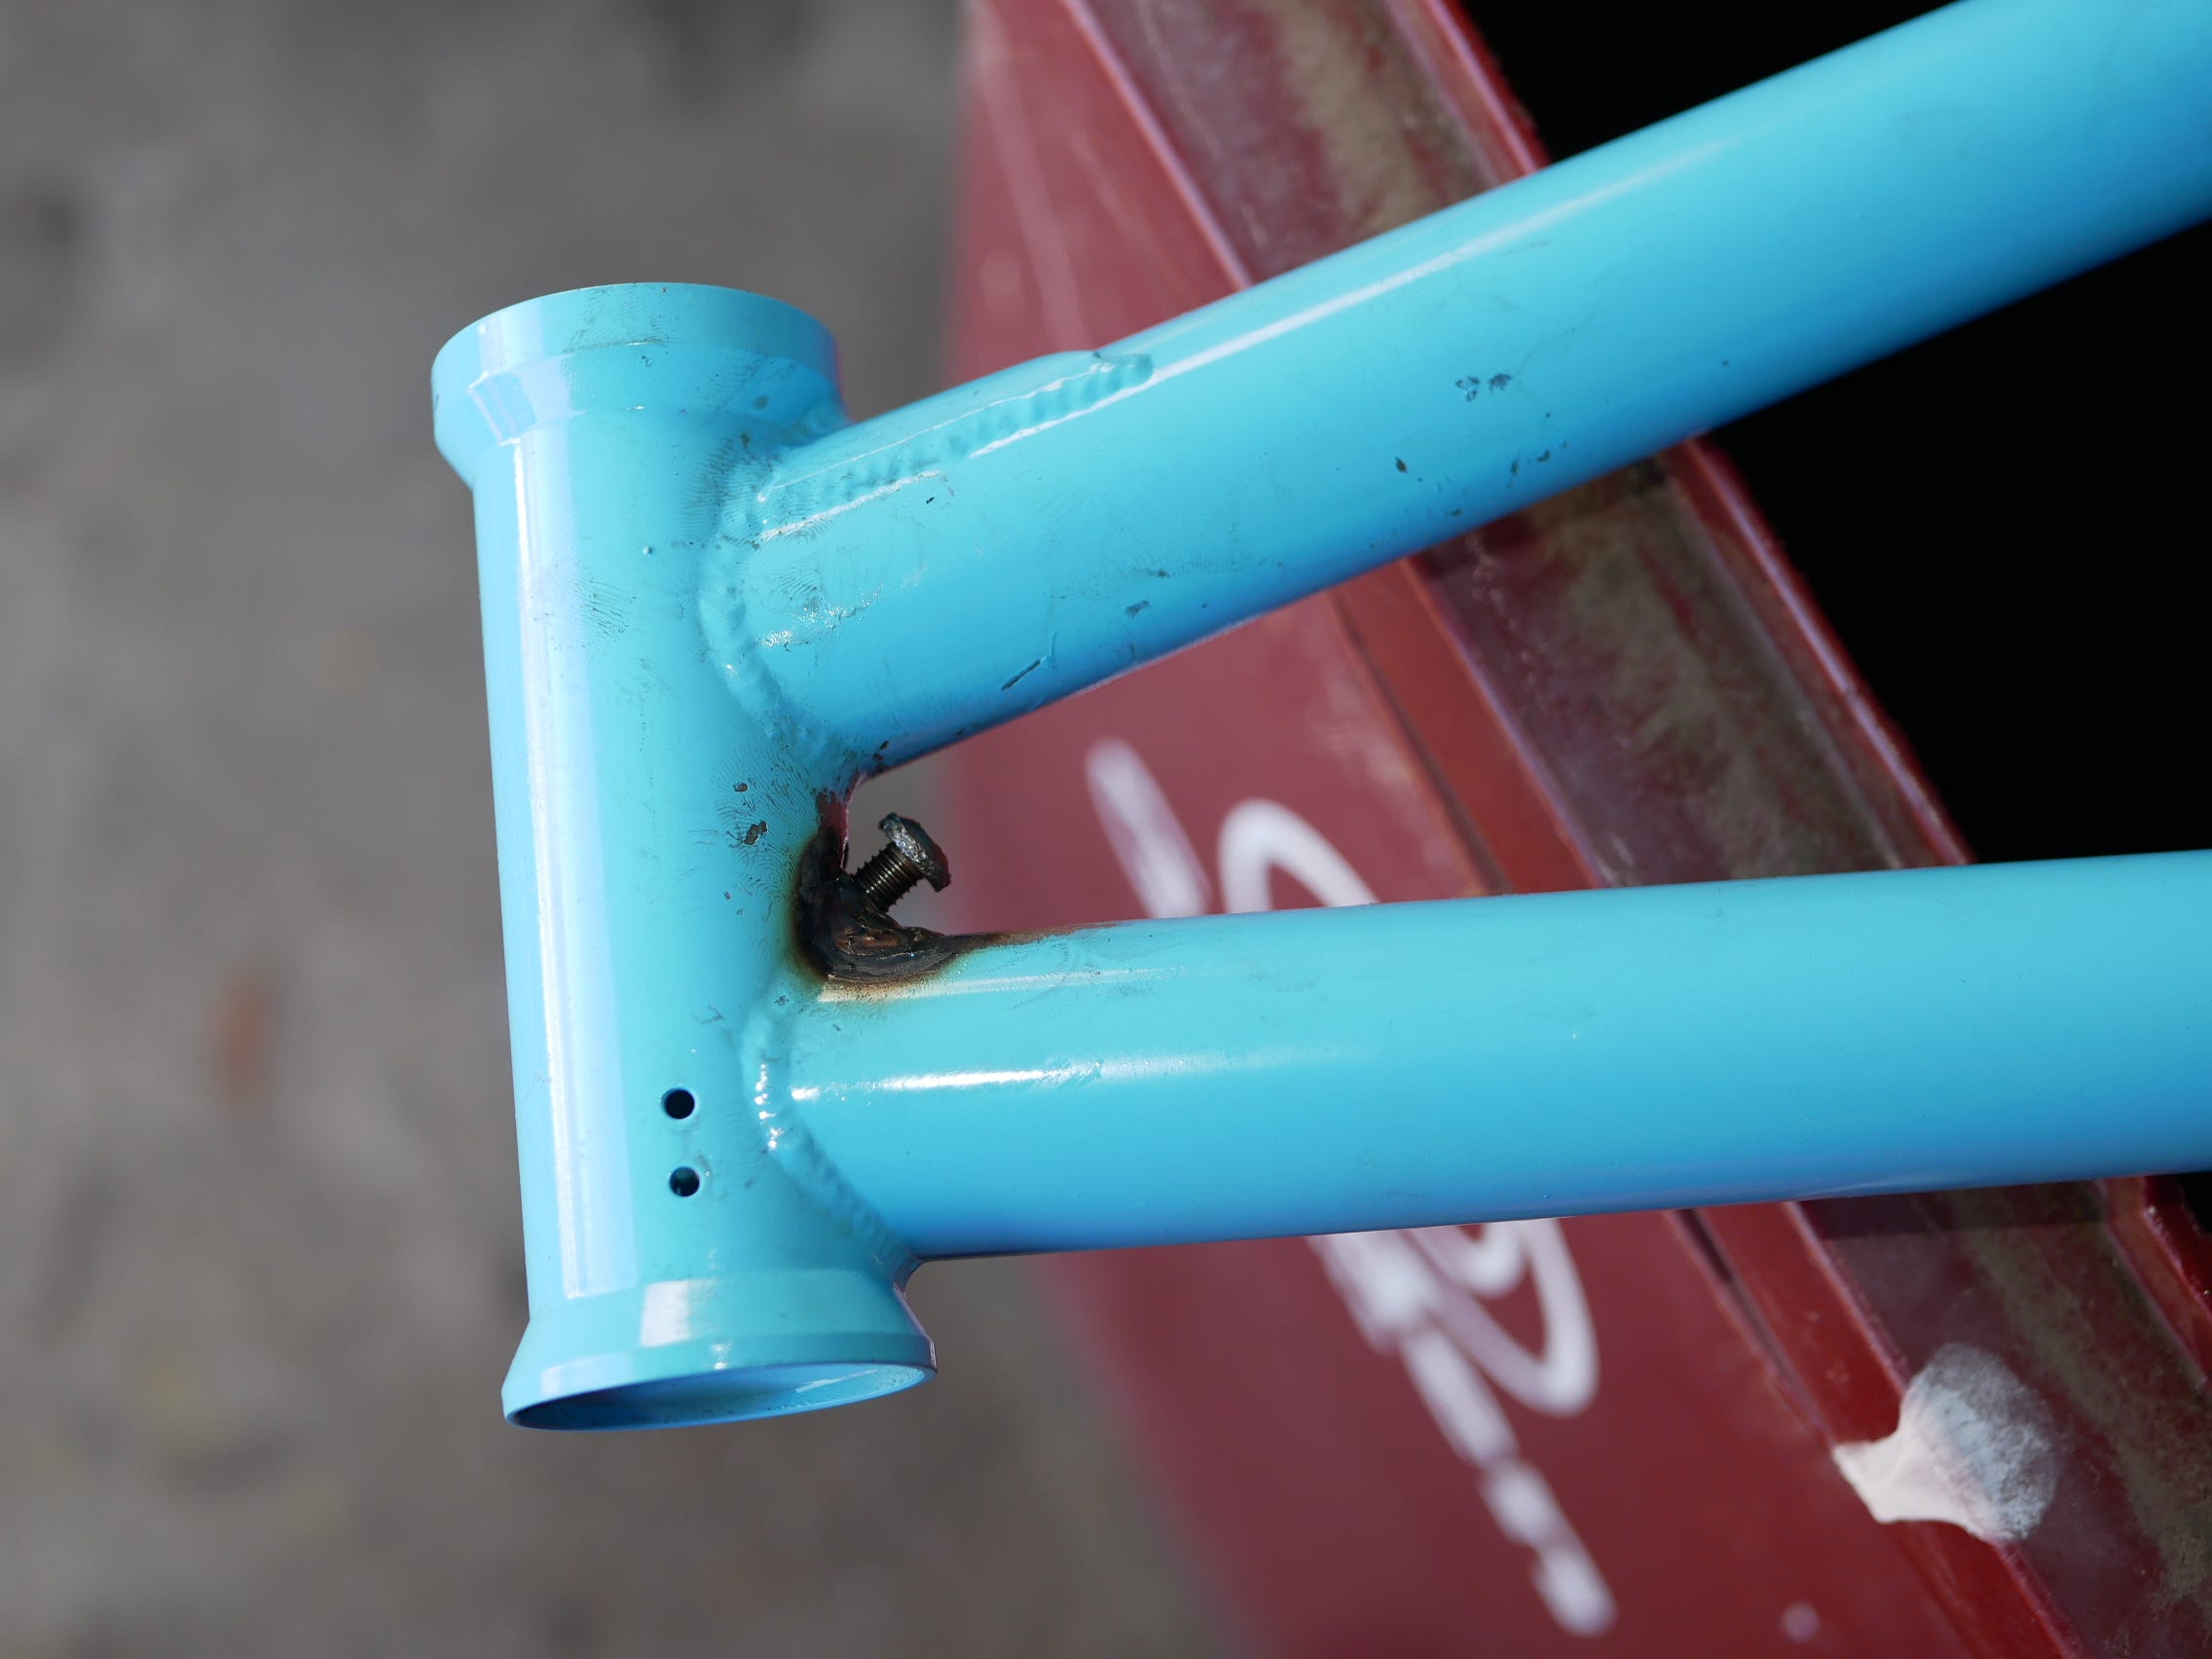
After taking the frame away from its hanging position to undo the Bolt, although initially it was quite a struggle….
Thankfully it had managed to be undone.
This Blog is the first part of the Project. Therefore….
A Follow up Blog has been attached “Below Image” showing the Next Phase of this Project. Cheers!
For your next BMX project, go for the RNDM-BMX Style with a touch of https://mywelders.com/ mountain cycle bmx. This combination offers a unique blend of rugged performance and stylish design. The Mountain Cycle BMX brings durability and versatility to your project, ensuring that your custom BMX bike stands out both in looks and performance.


For your next BMX project, go for the RNDM-BMX Style with a touch of https://mywelders.com/ mountain cycle bmx. This combination offers a unique blend of rugged performance and stylish design. The Mountain Cycle BMX brings durability and versatility to your project, ensuring that your custom BMX bike stands out both in looks and performance.